Ham Steak. Diner classic goes uptown.


My mother-in-law is a big Elvis fan and some years ago, she bought an Elvis cookbook. With all the stuff the king was allegedly fond of. Like Banana cream pudding, fried peanut butter sandwiches and German bratwurst. The book also says the was a fan of diner food and listed a recipe for ham steak with red eye gravy. When we first cooked it, it tasted horrible. Coffee too thin, too bitter, too salty. Terrible.

After some time, I came across another recipe for red eye gravy, this time with the addition of red currant jelly. Which absolutely made sense to me as I always drink my coffee very sweet (undrinkable, my husband would say). And out of nowhere came the inspiration to use Crème de Cassis (French black currant liqueur) and grenadine syrup instead.

Though nobody believes this is a good combination, all the guests that I made it for were totally impressed. Since then, this has become our meal for special occasions.

HAM STEAK WITH COFFEE-CASSIS SAUCE
for 4-6 people

4-6 large potatoes
vegetable oil, lard or duck fat for frying
salt

4-6 cooked ham slices, 1 cm thick
1 cup / 250 ml strong coffee
1/2 cup / 125 ml Crème de Cassis (French black currant liqueur)
1/2 cup / 125 ml grenadine syrup
tiny pinch of salt
cranberry sauce for serving


First, peel and cut the potatoes into 1 cm / playing dice sized cubes. Heat up your largest pan with some vegetable oil or lard and put the potato cubes into the pan, if possible in one layer. Generously salt, because potatoes need lots of salt. Very slowly fry them and turning them often until they are golden brown and delicious on all sides.

In France, I learned and tasted that the best fried potatoes are made in duck or goose fat. Fried on very low heat for over an hour. The potatoes will get a very delicate golden crust and the center is melting in your mouth. Absolutely delicious.


Cut away all the fat on the ham slices, cut the fat into little pieces and gently fry to render the fat. Fish out all the bits (don’t throw them away!) and fry the ham slices in the ham fat. Again until they are golden brown and delicious. Keep the fried slices warm and fry the next batch.

Oh, and please don’t use a non-stick pan for frying the ham – it’s impossible to build a pan sauce in a non-stick pan.


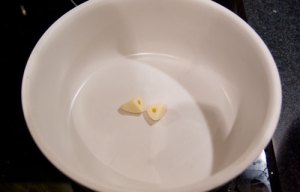
Next stop: coffee. I only have this espresso can, so I made 3/4 cup of espresso and thinned it with 1/4 cup water. As with almost everything in cooking: If you don’t like to drink it, don’t cook with it.


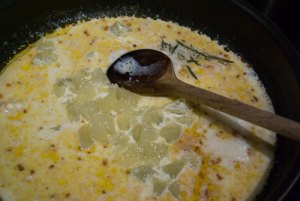
See the brown bits on the bottom of the pan? That’s the good stuff. Get out the last batch of ham slices and keep them warm with the rest. Now, pour in the coffee and cook and scrape the bottom until you have loosened all the bits.


Remember the little bits I told you not to throw away? Put them into the hot coffee and let them cook out for a bit. Why? Because they have plenty of the good brown stuff on them that will give your sauce even more taste. Add the currant liqueur and the grenadine syrup. Add a tiny pinch of salt – not too much because coffee with salt tastes really funky. Fish out the bacon bits with a slotted spoon.

If the sauce seems to thin, you can also thicken it with a slurry made of 1 tablespoon corn starch and some tablespoons of water. Let that cook for a minute.


Serve the ham with sauce and fried potatoes alongside with a good helping of cranberry sauce. Relax and enjoy!

Risotto alla Milanese. Spiced up a bit.


Basically, there is red risotto and white risotto. The red variety mostly contains tomatoes and bold flavors, whereas the white one goes better with more subtle flavors like mushrooms, asparagus and such. But as you might suspect, I like going for the intense flavors, so I took a classic recipe for Risotto alla Milanese and spiced it up a bit with chilies and peas.

This was on a evening shortly after my foot got operated on, so going shopping for groceries was out of the question. So risotto is once again a nice way of getting a nice meal out of the rests in your fridge and freezer.

RISOTTO ALLA MILANESE
for 3 (or 2 hungry ones)

3 tablespoons olive oil
3 jalapeños
3 garlic cloves, sliced
1 large onion, chopped
1 bay leaf
1 cup rice
1 cup / 250 ml white wine
2 cups / 500 ml stock (beef, chicken or vegetable, whatever you prefer)
a pinch of saffron
1 cup frozen peas
50 g / 2 tablespoons butter
1 cup grated Parmesan
salt and pepper


Get all your ingredients ready, slice up the chilis, the onion and the garlic.


Heat up a wide pot on low, pour in the olive oil and let the chilies, garlic and onion get some color. If you have onions, that is. I did not have any on that evening, but it tastes definitively better with onions.


Get in the rice and stir it in the oil until everything is covered.


Then get in the wine and the stock. In my opinion, there is no need for that tedious method of endless stirring and adding the liquid bit by bit. Just get it all in and stir every couple of minutes. This should take about 20 minutes, maybe more.


Throw in the saffron to give the risotto a good taste and a nice yellow color.


To get in a little more color, add a cup of frozen peas.


When the rice is cooked done, that is no more hard bits, but not mushy either, throw in a slice of butter. Then stir until all the butter is melted. You will see how creamy it gets just by adding the butter.


This is the key ingredient – Parmesan. This will give you a rich, creamy texture and some real complex flavors. I love Parmesan.


OK, in with the cheese and again, stir until everything is melted. Now, give it a taste if the risotto still needs some salt, add some fresh pepper and you’re good to go!


Serve with some more Parmesan and maybe a little bit of pesto (thinned with olive oil) drizzled on.

Pot roast. With carrots and red wine.


Last weekend I wrote about spaetzle, and how well they go with Sunday roasts. Well, this is a very classic pot roast, though I like to give it my twist and added some mushrooms. And of course, I like to be generous with the red wine, something my frugal grandma would never have done.

And if you’re not a fan of spaetzle (or just have eaten enough), then serve the roast with baked potatoes, pasta or – just as in this case – potato dumplings.


POT ROAST

2 kg / 4 pounds beef for braising
3 tablespoons vegetable oil
1 large onion
3 garlic gloves
1 Anaheim chili
4 large carrots
250 g / 8.8 oz mushrooms
1/2 bottle red wine
3 bay leaves
salt and pepper
8 thin bacon slices


First of all, the meat. Find a heavy pot like a dutch oven that is large enough for your piece of meat and where the knobs will survive several hours in the oven. My knob on the lid did not the last time and I had to invent some Rube Goldberg contraption with a potato ricer disk, some string, a cork and a bamboo skewer. Call me MacGyver.

OK, back to the roast. Heat up your pot on medium high, then pour in the oil and finally put in the chunk of meat. Let it brown on all sides. If it has a nice color all around, get it out on a plate and set it aside. Yeah, it will get cold, but who cares. It’s not cooked through anyway. 


Next stop, vegetables. Half the chili lengthwise and get out all the seeds.
Coarsly dice the onions and the garlic.
Peel the carrots and cut them into 2 cm / 1 inch chunks.
Peel the mushrooms.

I know, there’s much discussion about peeling vegetables such as carrots and mushrooms, but I don’t like to eat the skins. I know, I’m picky. Instead, I freeze the skins and when I have enough, I cook a vegetable broth.


Heat up the pot again, then throw in the carrots and mushrooms. When they have a nice color, add the onions and the garlic and cook it until the edges of the onion start to get brown.


Now comes in the red wine! And the spices! If you like, you can also add 3 cloves and 3 juniper berries for a more “winterly” or “chistmasy” taste.


Place the meat on top of the sauce and kind of wiggle it right in. Then lay the bacon slices on top of the meat, it doesn’t matter if the ends hang into the sauce. Put on the lid with your cork and string handle, then put it all into the oven for 2-3 hours at 150°C / 300°F.


When the time in the oven is over, get out the meat, the carrots and the mushrooms and put them on a heated plate. Also get out the bay leaves, cloves and juniper berries if you have put some in and throw them away.
Grab your immersion blender and mix the onions into the sauce, binding it that way. Give the sauce a taste and add some more salt, red wine and perhaps a little bit of cream.

When you’re done with finishing the sauce, cut the meat into finger-thick slices. And when you read somewhere “against the grain”: this means looking where the fibers in your meat go and cutting it in a 90° angle to the fiber. Because short fiber means tender meat.


Serve it all on a plate and with the rest of the bottle of red.
After eating, fall asleep on the couch.

Pizza. How to make it from scratch.


Most curiously, I hear so many people are afraid of yeast dough. They don’t dare even try it out – I mean, what is so bad if you really should end up ruining 2 cups of flour and a packet of yeast that are worth 50 cents together? In my opinion, building a dough with the creaming method, eg for cupcakes, starting with butter, then eggs, requires much more attention to timing, sequence and accuracy than a simple yeast dough. And with the dry yeast you can by nowadays there’s no fussing about with slurries, sugary water and what not.
It’s so easy even a kid can do it – throw all the ingredients together and start mixing, then leave it alone for an hour. Maybe that’s why this is one of the first things my mom taught me in baking.

By the way, my mom would use 500 g / 4 cups flour, resulting in a thicker pizza, more American style than Italian.

PIZZA DOUGH
makes 1 baking sheet

300 g / 2 1/2 cups flour
1 package dry yeast
1 teaspoon salt
4-5- tablespoons olive oil plus more for brushing
125 ml / 1/2 cup water, should be as warm as your body temperature

Mix all those ingredients together (either by hand or with a mixer with dough hook) until the dough forms a ball and doesn’t stick to the bowl anymore. If it doesn’t come together, add some more tablespoons of water.
Knead it for 5 minutes more, then cover the bowl and let the dough rise in a warm place until it is doubled in volume. This should take about 30-60 minutes.
If you have more time on hand, cover the bowl and put the dough for 24 hours in your refrigerator.You will have a much smoother and tastier dough this way.

Knead it quickly with your hands, form a ball, then press the dough ball into a disk. Put baking paper on you cookie sheet, lay the disk on it and start pressing it flat with your knuckles. This works best with oiled fingers. Get it as thin as you can and like. Now liberally brush the dough with olive oil and punch in some holes with a fork every couple of inches.

And then you can start spreading your favorite sauce and putting on all the toppings you like – in this case it was tomato sauce, Italian Salami, Parmesan cheese, olives – I like my pizza on the simple side. Bake for 15-30 minutes at 220°C/430°F, depending on you how thick the dough was rolled out and how crunchy you like your pizza.


As finishing touch, sprinkle with some olive oil and fresh herbs. Cut into pieces and enjoy with a nice glass of red wine and a movie.

Cheese Fondue. Gooey and delicious.


People who have visited me might know that I own more than 60 cookbooks. Yes, I collect them, yes, they are sorted by color, and what surprises most people: I read them. Really. From beginning to end. OK, not every single recipe, but I do open every page, look at every picture, read every recipe name and skim over the ingredient list and – once in a while – I read the entire recipe. If it sounds interesting, it gets a little pencil cross as a reminder. When I have the time (and the ingredients) I try a new recipe – and either the little cross will be erased (for example in the case of the cranberry brisket fiasco) or it gets a circle around it as sign of approval.

And if it was really good, I tend to make it over and over again. And at a certain point, I won’t need the recipe anymore as I understand the ratios. As in the case with the cheese fondue: half the amount of wine as you want cheese – by weight (a pint’s a pound, and a cup is half a pint). And regarding the cheese, that really depends on what you like and how much you can eat of it… My fondue cookbook says 100-150 g / 3.5-5 oz cheese per person, but in my family it’s more like 200 g / 7 oz per person. We really like our cheese.

CHEESE FONDUE 
for 2 really hungry ones

1 loaf of your favorite bread
500 g / 1 pound hard cheese, eg Emmental and Gruyère (50/50)
250 ml / 1 cup white wine, eg Riesling
1 tablespoon corn starch
2 tablespoons kirsch (min. 40% alcohol)
1-2 garlic cloves
dash of nutmeg (freshly ground)
salt and pepper


This is a recipe where you really have to set up everything before you begin to cook: lay the table first, set up the rechaud, fill the burner and have your matches ready.

Then, grate the cheese – and here’s a good rule for using the right cheeses in your fondue: if it is too soft to grate (for example a young Gouda), better not make it the main ingredient of your fondue or it will taste boring. And don’t be afraid of throwing in the rest of Roquefort, Stilton or Parmesan that you might find in your fridge. I know, this will make half Switzerland cringe in horror, but one of the best fondues I had was made entirely of cheese rests I found in my fridge.


Next, measure your wine and mix the starch and kirsch to form a little slurry.


Then, cut the garlic clove in half and with the cut side, rub over the entire inside of your pot. Make sure every bit is covered in garlic juice. Personally, I don’t think this is about taste, but about the oils covering the surface of the pot so that the cheese won’t stick so much.

And regarding the pot: DO NOT ATTEMPT THIS IN A METAL POT. It sticks. It tastes awful. It gets too hot and burns. The cleaning is a mess. And worst of all: the scratching noise of metal forks on the metal pot. Makes my teeth hurt worse than scratching with your fingernails on a black board.
Better use an earthenware pot (mine has a special black bottom so that I can use it like a regular pot on my stovetop) or an enamel pot.


Last preparation step: cut up enough bread into bite-size chunks (1-inch cubes). I like a heartier bread with a thick crust and try to cut it so that every bit has crust on it. A French baguette would also be nice or a nut or rye bread.


So, everything ready and prepared? Have a look around and check. Everything there? Then let’s cook.

Pour in the white wine into your pot, add the rest of the garlic (I like to crush it) as well as some nutmeg, salt and pepper. Start the heat on low, slowly turn up higher and wait until the wine boils.

As for the white wine: only use a wine you also like to drink. And in this case, aim for the more acidic varieties, like Riesling or Pinot Grigio. Stay away from Chardonnay. I’ve tried it and it tastes very strange.


This is the point where you will not be able to walk away, even for a few seconds.
When the wine boils, turn the heat down to medium-low, grab a handful of cheese and sprinkle it in. And always stir in the form of a number 8 or just back and forth through the middle. Never in circles or you’ll end up with a big cheese blob floating in a milky wine solution – not very appetizing. Did I mention this is about getting an emulsion? You’ll need fats and water getting the same temperature and to get them together you need to agitate/stir constantly.

When the first batch of cheese is melted, get the next handful of cheese, sprinkle it in and never stop stirring. Continue until you have used up all the cheese.

Now stir in the kirsch slurry, heat it up for another minute until the cheese mixture thickens up a bit. This step is entirely optional, but I think it tastes good and makes a nicer consistency.


Bring the pot to your table (you see, my earthenware pot is straight from the seventies), light the burner and start to eat. Once in a while, check the heat and that the bottom doesn’t burn too much.

Dip in a piece of bread, let it cool for some seconds and put it directly into your mouth. Or sprinkle it with a bit of paprika powder. And yes, at the right you can see chili sauce – my husband likes everything on the hotter side (this will make all the Swiss cringe in horror even more).

You remembered to serve the white wine and a shot glass with kirsch, right?


This is for advanced fondue eaters: Before you dip the bread into the cheese, let it soak up a little bit of kirsch. Just for kicks.

When all the cheese is gone, you will see a dark brown circle at the bottom of the pot. Don’t throw this out, this is the BEST part. Tradition says that the person who eats the crust has to do the dishes.
You might think this is a real chore getting all that gooey cheese out. It would be, if you started scrubbing right away. But if you fill the pot with cold water to the brim and let it soak over night, you can simply rinse out the cheese.

Aurora. Pasta for the undecided.


Pasta Aurora. Just the name sounds smooth and velvety. I call it pasta for the undecided, as my husband and I often argue, if we should have pasta with a tomato-based sauce or rather a cream-based sauce like carbonara or al limone. So most times if we can’t convince each other, we settle for a compromise: cream and tomato in equal parts.

It’s easy, it’s delicious and consists of things I always have at home. This is just a very basic recipe – you can change it and go as minimalistic (just tomato paste, cream, salt and pepper) or as exorbitantly creative as you like. This time, I went for onions, garlic and red wine – just because I had those things within reach and find them delicious…

PASTA AURORA for 2

250 g of your favorite pasta
2 tablespoons olive oil
1 onion, diced
1 garlic clove, chopped
1/2 cup / 125 ml red wine – optional
1 cup / 200 g tomato paste
1 cup / 200 g cream
salt and pepper
fresh basil
Parmesan cheese for serving


Those are your two main players: cream and tomato paste. You’ll need approximately equal parts, but please adjust the ratio to your taste! If you generally like your sauce on the creamy side (like I do), just add as much more cream as you like and you have in your fridge.

Here’s a tip for keeping tomato paste: I prefer to buy it in big cans but I don’t like keeping open cans in the fridge – even if they say it’s OK if they are coated on the inside. Anyway, I fill the rest of the tomato paste into a jar and top it off with oil – better vegetable than olive oil as the latter will crystallize in the low temperatures of your refrigerator.

Heat up a fairly big pan – regular or nonstick is up to you – on medium heat and put in some olive oil. Dice the onion and the garlic and let them get translucent and very slightly browned.

While you’re at it, bring enough salted water to boil and cook your pasta – test if they’re al dente and drain them.


This step is entirely optional – I simply had an open bottle of red, so I just thought: why not? It would be equally tasty with white wine or perhaps a little bit of vermouth.
Just pour the liquid on top of the onions and let it cook on medium until it’s almost gone.


See, most of the wine is gone and the rest looks like syrup (chefs call that a reduction). Go ahead and add the tomato paste. Stir it into the onion paste.


Time to add the cream. Don’t be shy. I will be delicious.


Stir slowly until you have a uniform sauce with approximately this bright orange color. Add the seasoning you like – salt and pepper are a must of course. But perhaps some Italian herbs or a little bit of sugar and balsamic vinegar would be nice.


Drain the pasta and mix it together with your sauce. Serve on your favorite plate with heaps of freshly grated Parmesan cheese and some basil.

Gulasch. Because autumn is arriving fast.


Do you also have an obsession of going to supermarkets in foreign countries? Personally, I think it’s exiting to see what’s similar, what’s different and to find things I’ve never seen before.
When I was on vacation in France in September, I found fresh “Piments d’Espelette”, or Espelette pepper. Espelette is a small town in Basque Country, near the Spanish border and famous for the houses covered with festoons of drying peppers. When the peppers are fresh, they are bright red and look like regular Hungarian peppers, but are definitively hotter. When they dry, they get darker until they look almost black. They are not extremely hot, but definitely too hot to be eaten as such.

Somehow in my mind, the visual similarity to the Hungarian bell peppers made me think of Gulasch, the perfect dish for cold autumn evenings. And it’s true what they say, Gulasch tastes much better on the next day!

GULASCH / GOULASH

750 g / 1,5 pounds beef
500 g / 1 pound onions
1 small garlic bulb, peeled
4 piments d’Espelette or bell peppers
3 tablespoons olive oil
2-3 tablespoons paprika powder
6-8 tablespoons tomato paste
750 ml / 3 cups / 1 bottle red wine
250 ml / 1 cup water
1-2 teaspoons salt


You won’t need much knife skills here, everything is cut into chunks. Cut the meat into dice – I like them in the 2.5 cm / 1 in range.
Peel the garlic and leave the cloves as they are. Maybe you could half one or two if you have very big ones.
Also, peel the onions, then dice them very coarsely. I only had rather small onions, so I halved them and cut the halves into quarters.


Now it’s the time to get out your latex gloves – especially if you are wearing contact lenses. Imagine rubbing all the capsaicin into your eyes while trying to get out the lens. No fun! By the way, capsaicin in hydrophobic, so use something fatty to make the burn less painful – like heavy or sour cream, cheese or olive oil.

Depending how hot the peppers are, remove the seeds completely or just some of them, then cut the flesh into nice little strips.


Get out your favorite large and heavy pot – mine is a blue Dutch oven I bought in France. They are called “cocotte” around there and “mini-cocottes” absolutely in this year. You see them anywhere, even at gas stations.

Heat the put up while it’s empty on medium-high heat, test if a drop of water “dances” around, then put in the oil. Let the oil get hot too, you’ll see ripples and just a tiny wisp of smoke, then put in a third of the beef cubes at max. Leave them alone and don’t try to turn them until you find that the sizzling noises sound a bit differently. Then try to turn the meat gently, if it still sticks, leave it alone for another minute or so. Maybe it just needs to get a little bit browner, then it won’t stick to the bottom any more.
When the meat has a nice brown color, put in the next few meat chunks and go on as above. Then repeat with the rest of the meat.

I like to brown the meat in 3 to 4 installments, because putting all the meat in the pot at once makes the temperature of pot and oil drop very quickly – and that results in the meat cooking and losing too much juice, and not frying.


If you have a pot that is big enough, you can simply add the onions and the garlic and let them brown with the meat. But in this case, my meat bits were getting in the way, so I put them out and then the onions in. Let it all get a nice touch of color.

See how the onions release a little bit of water and dissolve the brown bits from the bottom of the pan? This is why I always fry the meat first, and then the onions. I’ve tried it the other way round and ended up with onion coals and the meat not browned at all.


OK, get the meat back into the pot and and add the peppers, too. Then the paprika powder and the tomato paste and let it all get a tiny little bit of color.


Open the bottle of red and put it all in. No, this is no waste. You don’t have to by a Grand Cru for that, just something dry and red and heavy, like a Chianti, Shiraz or Rioja.
And don’t forget the salt…


Now, all you need is time. Cover and let it simmer (on low) for several hours, until the meat is soft. In fact, it should be so soft that you can separate the meat with a fork. Add a little bit of water if the meat is not covered any more.


See, no knife needed! And the onions and garlic are all cooked down to a thick and aromatic sauce.
Serve the Gulasch with potatoes, pasta or whatever else you like. And of course you remembered to buy a second bottle of that red? Then pour yourself a nice glass to go with it.

BBQ chicken. Somewhat Indian.


Summer finally arrived here in Munich – at least for the next two days, then it will be raining again. So I enjoy it while I can… And additionally, it’s the last week before my summer vacation! Just 5 more days to go, then I’ll be staying for 3 weeks in a small house in south-western France, just a 10 minute’s drive from the beach. And I’ll be spending the days at the beach and firing up a real barbecue every night. I really miss barbecues. Because there’s a law and/or regulation for everything in Germany, we’re not allowed to have a BBQ or just a gas grill on the balcony. So I have an electric griddle, but it’s really not the same.

Have you ever heard of the Steven Raichlen’s “Barbecue Bible“? It’s a thick cook book with tons of recipes and general instructions for grilling I find very helpful and interesting (but don’t trust me: I like reading cook books like other people read novels). This is one of the recipes I found work very well, even if you only can use an electric griddle (or a simply pan in winter) instead of a proper barbecue. It works really simple and the chicken tastes best with a side of grilled pita or focaccia bread, some tsaziki and maybe a nice green salad. Because you marinate the meat for several hours, it gets a tangy flavor from the yogurt and tastes exotic (but not too much) because of the different spices.

BBQ CHICKEN Tandoori style

175 g / 2/3 cup Greek yogurt (10% fat)
small pinch of saffron threads
3 large gloves garlic, minced
2,5 cm / 1 in long piece of fresh ginger, minced
salt and pepper
1 teaspoon Garam Masala
500 g / 1 lb chicken breasts


Mix the first 6 ingredients together.


Prepare the chicken breast the way you like them and place them in a Ziploc bag.

You can use whatever chicken parts you like, but I’m super picky with veins and silver skin, so I buy boneless and skinless ones and cut everything away I don’t like. By the way, I gently fry all those nasty bits in a pan with a little bit of oil and – as soon it cooled down a bit – my cat Henry is all over it.


Pour the yogurt mixture into the Ziploc bag, close the bag while getting out as much air as possible and make sure every chicken bit is covered with it. Put it in your fridge for a couple of hours – 2 are OK, overnight would be even better (don’t forget to put some beers in you fridge while you’re at it).

Fire up your BBQ/electric griddle and grill them until they are done and have some dark brown bits. Pop a beer and enjoy the meat with a good piece of grilled bread.

Flammekuchen. The lazy version.


The weather around Munich is changing every day, from sunny and warm to cloudy and cold. And back. Twice a day. This roller coaster ride really gets me tired. Plus taking some medicine that makes me feel nauseous all the time doesn’t help at all. So yesterday evening, all I wanted was a quick bite, watch a bit of TV and a hot shower before going to bed.

As I recently discovered that I’m luckily not lactose intolerant (as I thought for the last 2 years), I really enjoy eating dairy products again! Fructose, on the other hand is a whole different matter and I still have to find out what fruits and which amounts I can eat.

Flammekuchen (or tarte flambée) means “cake baked in the flames” and is a specialty Strasbourg in France is famous for. The original recipe calls for paper-thin yeast dough, with very thin coats of crème fraiche, onions and bacon, then baked for few minutes with very high heat. This is why one person can easily eat a sheet of Flammekuchen the size of a placemat or a baking sheet. My version on the other hand is much thicker, but it is a quick and lazy one and ready to eat in 15 minutes.

FLAMMEKUCHEN / FLAMMEKUECHE / TARTE FLAMBÉE

1 package pizza dough (ca. 400 g / 14 oz) or homemade pizza dough
200 g / 7 oz /1 cup crème fraîche (30% fat) or sour cream
200 g / 7 oz bacon
1 large onion, thinly sliced
salt and pepper


Preheat the oven to 200°C /400°F. Unroll the pizza dough and place it on a baking sheet, with some baking parchment between them (you can roll the dough even thinner if you like, but I didn’t care yesterday). Thinly spread the crème fraîche on the pizza, then sprinkle generously with salt and pepper. Then, cut onion and bacon into very thin strips, scatter onion and bacon bits on top of the crème fraîche. Pop it into the oven for 10 minutes, or until the dough is cooked through and the corners are getting brown. Serve with a nice glass of chilled white wine and enjoy!

Al limone. Even quicker comfort food.


Pasta. Again.
Having a husband who wants to eat pasta every single day, I end up cooking pasta quite often. Today, it was pasta al limone – even simpler and with less ingredients than carbonara, most of which I always have at home. That is cream, lemons and garlic. The pasta doesn’t look very spectacular – some might even say boring – but the taste is fantastic. And the biggest plus: the whole meal just takes as long to prepare as the pasta needs to cook. That means: hot dinner in 10 minutes. Try and beat that.

SPAGHETTI AL LIMONE for 2
(recipe adapted from Sophia Loren – yes, the actress!)
250 g pasta (I like spaghetti, linguini or fussili)
2 tbsp butter
1 sprig rosemary
2 cloves garlic
1 lemon
1/2 cup cream (min. 30% fat)
salt and pepper
Parmesan cheese to taste

Bring enough water to boil (if you’re in a real hurry, use an electric kettle), add enough salt so that it tastes like sea water and throw in the spaghetti.


Heat up a pan, melt the butter on low heat, then put in the peeled and crushed garlic as well as the rosemary and let it fry on low until it gets a light golden color. In the meantime, cut fillets out of the lemon (or if you’re lazy, just squeeze out the juice).


Pour the cream into the pan, then stir in the lemon fillets/juice. I will thicken up a bit, but it won’t curdle – unless of course, you used anything with less than 30% milk fat in your cream. Come to think of it, that’s not even 1/4 of a cup of cream in this meal per person – one helping of ice cream must contain much more than that.


Back to business: drain the pasta and mix it with the sauce, add salt and pepper to taste. And if you have a nice husband who sets up the table in the meantime, you’re ready to eat. Oh, and don’t forget to sprinkle each plate of pasta with lots of pepper and freshly grated Parmesan…