Roast Chicken. Leaping frogs and butterflies.

ROAST CHICKEN
(adapted from Alton Brown, on youtube: part 1 and part 2)

1 chicken (mine was around 2 kg)
1 1/2 teaspoons black peppercorns
4 garlic cloves, minced
1/2 teaspoon coarse sea salt
1 lemon, just the zest
2-3 tablespoons olive oil
fresh parsley, chopped
6 carrots
1 leek
1/2 celeriac
2 cups red wine (white wine also works!)
lemon juice
salt


This is a chicken I bought at my supermarket. And I realized that the whole chicken is much cheaper than buying just parts of it. Another big advantage: my husband and I never argue, because he prefers the breast meat and I the legs.

You can roast the chicken whole, but I for my part can never remember if you should put up first the breast or the back side. And on the bottom side, the skin will always be soggy instead of crunchy. Apart from the trouble cutting up a whole, piping hot chicken. In my case, that ends often in disaster – much to the joy of Henry and Nala

Before you start anything at all, preheat your oven/broiler to the highest setting.


When I saw Alton Brown’s Good Eats episode on spatchcocking/butterflying a chicken, I thought “genius”: all the skin is facing up and I don’t have to go through all my chicken recipes to find out if the breast or back side should go up first. And a bit later, I discovered the “leaping frog” method of cutting up a chicken on the internet.. I find it even better: you just cut it up, not cutting things away (like the backbone). Head over to Gourmet for detailed pictures, but no worries, this is really easy.

  • Place the chicken on the cutting board with the legs facing you and upwards. 
  • Cut the skin in the crease between the drumsticks and the body. Try not to cut the meat, just the skin and connective tissue – let gravity help you! 
  • Flatten the drumsticks, so that they lie flat on your cutting board. OK if you hear the joint pop, but don’t worry if you don’t.
  • Take your sharpest knife or kitchen shears and cut the ribcage in half, parallel to the backbone. No need to be too exact.
  • Flip the bird open like a book, lay it on the board with the skin side up and press down on the breast and backbone with the heel of your hand. Done!

My cutting boards are all way too small, I know.


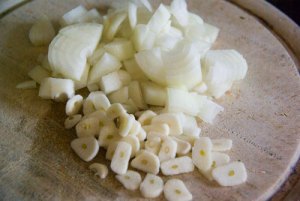
Next stop: the spice mix. Put whole pepper corns in your mortar and crunch them up a bit. Add the peeled and chopped garlic and coarse salt and make a paste.

If you don’t happen to have pestle and mortar at home, crush the pepper corns on a cutting board with a meat hammer or something else that’s heavy and has a flat bottom. Search your house and be creative: marble slabs, corn cans, mason jars work just fine. Or just fill your pepper mill with 1 1/2 teaspoons pepper and grind it all on the coarsest setting. Puree or press the garlic and mix with the pepper in a bowl.


Grab a lemon (and read the label before buying it – be sure that it’s not been chemically treated so that you can eat the peel). Run it over the zester to get just the yellow part of the peel, not the white stuff – it’s bitter.

No zester at home? Any other fine grater will do. Or a vegetable peeler and then chopping the strips up very finely. But let me tell you – buy a microplane zester. It works wonderfully on citrus peel and parmesan and it is incredibly sharp. Don’t ask how many fingernails I ruined.


Mix the lemon peel with the garlic/pepper paste and thin it with olive oil. Chop a small handful of parsley and mix it with the rest.


Mr. Brown says to use a teaspoon, but I made a little piping bag. Just fill the paste into the corner of a regular freezer bag, twist it closed and – in the last moment – cut away the tip of the corner.


Wiggle your index finger between the meat and the chicken skin to loosen it. Be gentle and try not to tear the skin. You don’t need to get it all loose, just the breasts and the drumsticks are fine. Pipe in around 1 teaspoon of the spice mix and massage the skin so that you spread the spices under the skin. Don’t worry if you have some of the paste left.

Why under the skin? Basically, skin is there to keep the good things in and the bad things out. But I guess you want the meat to get a taste of the spices and that would not happen if you put the spices on the outside of the skin. And of course in the hot oven, all those delicate spices would burn and leave you with a taste of charcoal.


Cut the vegetables into finger-long pieces and cover the bottom of an ovenproof pan or roasting pan. I used my favorite, a cast iron Le Creuset pan. But work with anything you have – even a disposable aluminum pan works fine.

Use whatever vegetables you happen to have, even if they’re not at their best anymore and as long as they don’t tend to get mushy when cooked. Potatoes and whole onions would also work fine. In Germany, you often find “soup vegetables”, that is celeriac, carrots, leeks and parsley bound together. The perfect combination for this.


Lay the chicken on top of the vegetables and massage some olive oil onto the skin. You want a crispy skin, right? Put it into the oven for 20-30 minutes – you want a crispy brown skin and an internal temperature of both breast and drumstick of 165°F / 74°C.


While you’re at it, wash some small potatoes, brush them with olive oil and sprinkle with coarse salt. Pop them into the oven on a roast underneath the chicken. They should be ready just the same time as the chicken.


The meat was done, but for my taste, the skin could have been darker. Seems my oven does not get really hot anymore. Anyway, when the chicken is done, get it out of the oven and let it rest on a plate, cover with foil or another plate.


Crank up the heat of your largest stovetop and pour in the wine, let it cook and reduce a bit. While it cooks, scrape the bottom and sides of the pan to dissolve all that brown, crunchy stuff. This is what makes the difference between a good sauce and a really, really good sauce. Stir the vegetables so that the brown parts are submerged in the sauce. After 10 minutes, you can fish out all the vegetables if you don’t like them – in fact, I liked the wine-soaked carrots very much.

Give it a taste and season with lemon juice, salt and the leftover pepper-lemon-paste. Tastes good? OK, you’re done!


Now all you need to do is carve the chicken breasts, cut away the drumsticks and serve with potatoes and the sauce. Steal the skin from your husband’s plate and enjoy with a glass of wine.

Dates and bacon. Only better with parmesan.


In foodie questionnaires, one question that almost always pops up is: “sweet or savory?” Seems that I belong to the rather small group that answers: “both! at the same time!” I have always been a fan of sweet/salty combinations, like cheese and membrillo, toast Hawaii or arroz a la cubana (fried rice, eggs and bananas). As Flo finds those combinations ranging between barley edible to downright revolting, I sometimes make myself something he really doesn’t like – when he’s not there. For example, dates rolled in bacon, then fried until crispy. This is a classic combination, just like prunes rolled in bacon. Then I read somewhere about filling them with Parmesan. And let me tell you, this takes this party classic to a whole new level.

Side note for you fructose malabsorption guys: dates contain sorbitol, which deactivates the very few fructose transporters you have. For me, 4 dates are just the limit.


DATES AND BACON
for 1 (multiply as needed)

4 large dates
2 thick slices of bacon, halved
2 thick slices of Parmesan cheese
4 toothpicks


Slice the dates open on lengthwise with a knife and get out the pit.


Cut the Parmesan into sticks and replace the pit with cheese. Squeeze the date shut.


Wrap the bacon around the filled date and secure it with a toothpick.


Heat up a little pan and gently fry the dates until the bacon is brown and crispy.
Get back to the couch and watch your favorite TV show while nibbling away…

Sauerbraten. With the brine, you’re halfway there.

Sauerbraten is a very traditional German roast, the sweet and sour brother of the pot roast. And to make it, just put the meat into the brine for a couple of days (check and turn over every day) and then follow the directions for pot roast, but instead of the wine and onions, use the brine. And when making the sauce, add a handful of raisins and almond slivers. And then you’ll have a very nice dish that goes very nicely with potato dumplings or spaetzle.

Of course you can also use this brine for any other kind of meat, especially venison and other game would work pretty fine.

BRINE FOR SAUERBRATEN

375 ml / 1,5 cups red wine
375 ml / 1,5 cups red wine vinegar
375 ml / 1,5 cups water
1 teaspoon salt
8 peppercorns
3 bay leaves
4 cloves
8 juniper berries
2 onions, cut into rings
2 carrots, cut into thin slices
1/4 celery root, cut into matchsticks

Put all together into a large pot and let it simmer for 10 minutes. Let the brine cool off and pour over your meat, which can stay in there covered for 2-5 days in your fridge.

Beef and Guinness Stew Pie. Sort of.


My dad went for a business trip to Zwickau – that’s in the Eastern part of Germany. And he brought back several bottles of “Mauritius” beer. And it was very tasty stuff. Dark, slightly sweet, not too bitter. As I stayed with my parents over new year’s, we drank quite a bit and suddenly I was remembering the taste of Guinness in the Irish Pub in Auckland, New Zealand. And my husband’s tales of the pub in Hamilton, where he had a dish called “Beef in Guinness”, a very dark, rich stew with fork-tender meat, served with garlic bread and – of course – a pint of Guinness. And so we made “Beef and Guinness” the next day, but with Mauritius. While we were cooking, my mom remebered having eaten pot pies on a trip to UK – and so we covered the stew with flaky pastry. The perfect winter food – and with the perfect timing, as it just stared to snow…


BEEF AND GUINNESS STEW PIES
adapted from Epicurious and Food Network 

2 cups carrots, cut into 1-inch chunks
3 parsnips, cut into 1-inch chunks
2 large onions, coarsely chopped
1 garlic clove, crushed
1 kg / 2 pounds stewing beef, cut into 1-inch chunks
3 tablespoons oil
2 tablespoons flour
salt and pepper
cayenne pepper
2-3 tablespoons tomato paste
1 1/2 cups / 375 ml Guinness (or other dark stout)
fresh thyme
1 teaspoon Worcestershire sauce
1 cup mushrooms (I used sliced champignons)

1 package flaky pastry (from the freezer, thawed)
1 egg, beaten
fresh parsley


Peel the carrots and the parsnips and cut them into nice big chunks – in this case, slices 1 inch thick. And also cut the beef into 1-inch pieces. No need to be too exact here. 


Also, cut the garlic and onions quite coarsely, I like the garlic in slices. Leave the thyme as it is. And save the parsley for later.


This is a neat little trick: Pour the oil on the raw meat and toss until all the pieces are covered. And then add the flour, salt, pepper and cayenne pepper and toss again. When you now fry the meat, it will get a nice brown crust, but without flour lumps or too much flour so that it would feel breaded.

Heat up a large pot on medium-high until it is really hot, and only then pour in some oil. Fry the meat in batches until all sides are brown, then get it out and keep on a hot plate.


Throw in onions, garlic, carrots and parsnips and fry them in the hot oil until they have softened a bit. Add the tomato paste and also let it fry for some moments.

Letting the tomato paste fry makes for a caramelized flavor and gets rid of some of the sour edge.


The meat may now return to the pot. Mix it well with all the vegetables and add the thyme. Also, put in the mushrooms.


And now comes in the beer. Just pour it in until the meat and vegetables are just barely covered. Season with salt and let it cook covered until the meat is tender. That should take about 2 hours – or 1/2 hour when you’re using a pressure cooker.
Add more liquid if too much is evaporating.


Remove the thyme and give it another taste – more salt, maybe a splash of Worcestershire Sauce? If you’re really hungry, you can eat it just like that, just make sure you have some bread to steep up the sauce. It’s delicious.
Maybe even some garlic bread straight from the oven…


But if you want to make little pot pies, fill some 1-cup ovenproof dishes 3/4 full. Then cover with the thawed flaky pastry. Trim the edges with a knife and crimp the dough on the edges.


Then brush it very lightly with a beaten egg and bake it for 25 minutes at 200°C / 400°F until the crust is dark golden.


Now grab a spoon and dig right in.
Literally.

And of course you have some bottles of stout left. Right?

Chorizo and Potatoes. Minimalistic in every way.


When I visited Spain some time ago, we went into a tapas bar. At first, I thought: “Do I really want to eat here?” It was really dark, from the ceiling were hanging dozens of whole hams, the interior was shabby and the floor was covered with used toothpicks. But at a closer look, all the people inside were having a good time, the whole 10 meters of the bar top were laden with snacks of all kinds and it all smelled incredibly good. So we ordered some sherry and took from the bar what we liked. We had planned to eat dinner afterward, but we came out of the bar feeling slightly tipsy and incredibly full.

One of the classic tapas is chorizo and potatoes cooked together and you won’t believe how easy this is. It tastes complex, the sauce looks like it has been cooked for hours and it warms your soul. But all you need is found in all kitchens, even that of a student that has just moved in. As for cooking skills: if you can hold a knife and know how to turn up the heat on your stovetop, you’re good to go.


CHORIZO AND POTATOES

1/2 – 1 chorizo or salsiccia sausage, hot if possible
450 g / 1 pound potatoes
1 large onion
garlic (optional)
olive oil
salt and pepper


This is basically all you need: chorizo, potatoes and an onion. Garlic is optional and you should be able to find some kind of oil or fat in your kitchen. And I really do hope there’s salt and pepper around. Oh, and you’ll also need water. I don’t know why, but nobody mentions water in the ingredient list in cooking but always in baking.

As for the hardware, you’ll only need a knife, a spoon to stir and a pot or pan. OK, maybe a cutting board, but that’s it. Even the most rudimentary equipped kitchen will have all this.


Cut everything into nice, big chunks. No need to be exact here, just cut it the way you like.


I like my potatoes in 1 cm cubes, no matter if I fry or cook them. Again, cut them any way you like, but they should be somehow bite-sized.

If you peel them is up to your tools and skills, your taste – and your laziness…


Heat up your pan or pot on medium, then add the oil and the chorizo. Let the sausage fry until you see a dark crust forming on them.


Add the onions and the garlic and also cook them in the oil until they are soft and the edges start to get brown.


Add the potatoes and let it cook on medium-low for about 25 minutes, until the potatoes are done and most of the water has evaporated.


Fill into your favorite bowl or plate, or eat it just right out of the pot. No garnishing.

Tastes best with a glass of red wine and some green olives. Think of your visit to Spain ages ago.

Lasagna. Brings back childhood memories.


My mom learned to cook with an Italian family. So in my childhood, many of the everyday dishes were Italian – like pasta, gnocchi or risotto. Lasagna being – as it is rather labor intensive – a treat for special occasions. Plus, 25 years ago in Germany, there simply weren’t any lasagna sheets to buy in the supermarkets. So my mom also made the pasta sheets from scratch.

And this is what the perfect lasagna looks like – at least in my opinion: 5 to 6 layers of pasta, thick beef sugo, a savoury Béchamel sauce and a thick, cheesy crust. No 1000 layers of dough, no ham slices and no pools of aurora sauce. But maybe that’s just me…

LASAGNA

SUGO
1 large onion
2-3 garlic cloves
3 tablespoons olive oil
500 g / 1 pound ground beef
a sprig of rosemary
2 bay leaves
dried chili flakes
1 tube / 200 g / 7 oz tomato paste
250 ml / 1 cup red wine
salt and pepper
2 teaspoons sugar
1/2 cup green olives, sliced
1 tablespoon balsamic vinegar

BECHAMEL
50 g / 1/2 stick butter
50 g / 1,75 oz flour
750 ml / 3 cups milk
nutmeg
salt and pepper
dash of lemon juice

LASAGNA
lasagna pasta, fresh if possible
200 g / 7 oz cheese, grated (I took Gouda)


Roughly chop up the onion and the garlic. I like thick garlic slices, so you will have some short bursts of roasted garlic flavor in your dish. And people who don’t like garlic can easily sort them out.


Heat up a large pan (non-stick if you have) on high, then pour in the olive oil and put in the ground beef and let it brown and cook through. Add the onions, the garlic and the spices and fry that a little bit more so that the onions also will get some color.


Add the tomato paste, let that also fry for a little bit (so that some sugars in it caramelize) and then pour on the red wine and enough water to cover. Stir until all the tomato paste and the brown bits on the bottom of the pan have dissolved. Add the rest of the condiments and the olives and let that continue to cook on low while you make the Béchamel sauce. Give it a taste once in a while.

And before assembling the lasagna, fish out the bay leaves and the rosemary sprig. They taste terrible in a lasagna. Trust me, I tried…


For the Béchamel sauce, melt the butter in a smaller pot on medium heat. Put in all the flour at once and stir with a whisk until you cannot see any more dry flour. Continue stirring and frying until the flour and butter have taken a light golden color. That takes about 2 minutes.


Now add about 1/2 cup of milk and stir until the mixture becomes quite thick (it will feel like soft play dough), then add a little more milk and continue stirring. Always add a little more milk until you feel the sauce thickening. Use up all the milk and if you find it too thick you can still add some water. Season with salt, pepper, fresh nutmeg and a dash of lemon juice and let it cook for some more minutes.

This is a very basic Béchamel sauce, but you can make it more elaborate by first frying some shallots in the butter before adding the flour. Or by using half cream and half stock to build the sauce. Just remember to take the same amount of butter and flour, cooking that unitl it gets golden and then adding a cold liquid. 

That’s another basic rule for using flour / starch to thicken liquids: Always have one cold and the other hot or you will end up having lumps and a starchy flavor. Vice versa, this also is true for thickening a hot sauce with a slurry – which always has to be cold.

Oh, and please do me the favor and ALWAYS add some lemon juice or vinegar to your Béchamel sauces. Yes, that will make the sauce a lot thinner, but the taste without the lemony zing is just flat.


Now, to assemble the lasagna: First of all, preheat your oven to 180°C / 350°F. Then take you favorite casserole – glass, ceramics or metal doesn’t matter. This is a rather small casserole, about 20 by 15 cm.

Most important step of all: Put a rather thick layer of Béchamel sauce on the bottom of the casserole. This saves you buttering the dish and prevents the bottom pasta sheet from becoming a leathery and uncuttable layer.


Then, lay on one sheet of lasagna pasta – these were store-bought fresh ones. You can also use the pre-cooked hard ones, but then you should add some more water to both sauces before building the lasagna as they will need more cooking liquid.

Then spread on a big spoonful of the sugo and some dollops of Béchamel sauce. Then again pasta, sugo and Béchamel until you have used up the sugo or you have reached the top of your baking dish. Make sure you have some Béchamel left.


The last and top layer will be a pasta sheet topped with the (generous) rest of your Béchamel and lots of cheese.

As much as I love Parmesan – do not use it here or at least not as the sole cheese. It was aged for so long, it is rather dry and will burn very quickly. Also, I’m a fan of a thick, gooey cheese crust, so I stay with Gouda.

At this point, you could freeze the lasagna and then bake it some other time.


Put the lasagna it the oven and bake it for about 30-45 minutes – depending on how crusty you like your cheese. And let it stand for some minutes.


Cut out some rectangular pieces and have a glass of red wine with it.

Ham Steak. Diner classic goes uptown.


My mother-in-law is a big Elvis fan and some years ago, she bought an Elvis cookbook. With all the stuff the king was allegedly fond of. Like Banana cream pudding, fried peanut butter sandwiches and German bratwurst. The book also says the was a fan of diner food and listed a recipe for ham steak with red eye gravy. When we first cooked it, it tasted horrible. Coffee too thin, too bitter, too salty. Terrible.

After some time, I came across another recipe for red eye gravy, this time with the addition of red currant jelly. Which absolutely made sense to me as I always drink my coffee very sweet (undrinkable, my husband would say). And out of nowhere came the inspiration to use Crème de Cassis (French black currant liqueur) and grenadine syrup instead.

Though nobody believes this is a good combination, all the guests that I made it for were totally impressed. Since then, this has become our meal for special occasions.

HAM STEAK WITH COFFEE-CASSIS SAUCE
for 4-6 people

4-6 large potatoes
vegetable oil, lard or duck fat for frying
salt

4-6 cooked ham slices, 1 cm thick
1 cup / 250 ml strong coffee
1/2 cup / 125 ml Crème de Cassis (French black currant liqueur)
1/2 cup / 125 ml grenadine syrup
tiny pinch of salt
cranberry sauce for serving


First, peel and cut the potatoes into 1 cm / playing dice sized cubes. Heat up your largest pan with some vegetable oil or lard and put the potato cubes into the pan, if possible in one layer. Generously salt, because potatoes need lots of salt. Very slowly fry them and turning them often until they are golden brown and delicious on all sides.

In France, I learned and tasted that the best fried potatoes are made in duck or goose fat. Fried on very low heat for over an hour. The potatoes will get a very delicate golden crust and the center is melting in your mouth. Absolutely delicious.


Cut away all the fat on the ham slices, cut the fat into little pieces and gently fry to render the fat. Fish out all the bits (don’t throw them away!) and fry the ham slices in the ham fat. Again until they are golden brown and delicious. Keep the fried slices warm and fry the next batch.

Oh, and please don’t use a non-stick pan for frying the ham – it’s impossible to build a pan sauce in a non-stick pan.


Next stop: coffee. I only have this espresso can, so I made 3/4 cup of espresso and thinned it with 1/4 cup water. As with almost everything in cooking: If you don’t like to drink it, don’t cook with it.


See the brown bits on the bottom of the pan? That’s the good stuff. Get out the last batch of ham slices and keep them warm with the rest. Now, pour in the coffee and cook and scrape the bottom until you have loosened all the bits.


Remember the little bits I told you not to throw away? Put them into the hot coffee and let them cook out for a bit. Why? Because they have plenty of the good brown stuff on them that will give your sauce even more taste. Add the currant liqueur and the grenadine syrup. Add a tiny pinch of salt – not too much because coffee with salt tastes really funky. Fish out the bacon bits with a slotted spoon.

If the sauce seems to thin, you can also thicken it with a slurry made of 1 tablespoon corn starch and some tablespoons of water. Let that cook for a minute.


Serve the ham with sauce and fried potatoes alongside with a good helping of cranberry sauce. Relax and enjoy!

Pot roast. With carrots and red wine.


Last weekend I wrote about spaetzle, and how well they go with Sunday roasts. Well, this is a very classic pot roast, though I like to give it my twist and added some mushrooms. And of course, I like to be generous with the red wine, something my frugal grandma would never have done.

And if you’re not a fan of spaetzle (or just have eaten enough), then serve the roast with baked potatoes, pasta or – just as in this case – potato dumplings.


POT ROAST

2 kg / 4 pounds beef for braising
3 tablespoons vegetable oil
1 large onion
3 garlic gloves
1 Anaheim chili
4 large carrots
250 g / 8.8 oz mushrooms
1/2 bottle red wine
3 bay leaves
salt and pepper
8 thin bacon slices


First of all, the meat. Find a heavy pot like a dutch oven that is large enough for your piece of meat and where the knobs will survive several hours in the oven. My knob on the lid did not the last time and I had to invent some Rube Goldberg contraption with a potato ricer disk, some string, a cork and a bamboo skewer. Call me MacGyver.

OK, back to the roast. Heat up your pot on medium high, then pour in the oil and finally put in the chunk of meat. Let it brown on all sides. If it has a nice color all around, get it out on a plate and set it aside. Yeah, it will get cold, but who cares. It’s not cooked through anyway. 


Next stop, vegetables. Half the chili lengthwise and get out all the seeds.
Coarsly dice the onions and the garlic.
Peel the carrots and cut them into 2 cm / 1 inch chunks.
Peel the mushrooms.

I know, there’s much discussion about peeling vegetables such as carrots and mushrooms, but I don’t like to eat the skins. I know, I’m picky. Instead, I freeze the skins and when I have enough, I cook a vegetable broth.


Heat up the pot again, then throw in the carrots and mushrooms. When they have a nice color, add the onions and the garlic and cook it until the edges of the onion start to get brown.


Now comes in the red wine! And the spices! If you like, you can also add 3 cloves and 3 juniper berries for a more “winterly” or “chistmasy” taste.


Place the meat on top of the sauce and kind of wiggle it right in. Then lay the bacon slices on top of the meat, it doesn’t matter if the ends hang into the sauce. Put on the lid with your cork and string handle, then put it all into the oven for 2-3 hours at 150°C / 300°F.


When the time in the oven is over, get out the meat, the carrots and the mushrooms and put them on a heated plate. Also get out the bay leaves, cloves and juniper berries if you have put some in and throw them away.
Grab your immersion blender and mix the onions into the sauce, binding it that way. Give the sauce a taste and add some more salt, red wine and perhaps a little bit of cream.

When you’re done with finishing the sauce, cut the meat into finger-thick slices. And when you read somewhere “against the grain”: this means looking where the fibers in your meat go and cutting it in a 90° angle to the fiber. Because short fiber means tender meat.


Serve it all on a plate and with the rest of the bottle of red.
After eating, fall asleep on the couch.

Pizza. How to make it from scratch.


Most curiously, I hear so many people are afraid of yeast dough. They don’t dare even try it out – I mean, what is so bad if you really should end up ruining 2 cups of flour and a packet of yeast that are worth 50 cents together? In my opinion, building a dough with the creaming method, eg for cupcakes, starting with butter, then eggs, requires much more attention to timing, sequence and accuracy than a simple yeast dough. And with the dry yeast you can by nowadays there’s no fussing about with slurries, sugary water and what not.
It’s so easy even a kid can do it – throw all the ingredients together and start mixing, then leave it alone for an hour. Maybe that’s why this is one of the first things my mom taught me in baking.

By the way, my mom would use 500 g / 4 cups flour, resulting in a thicker pizza, more American style than Italian.

PIZZA DOUGH
makes 1 baking sheet

300 g / 2 1/2 cups flour
1 package dry yeast
1 teaspoon salt
4-5- tablespoons olive oil plus more for brushing
125 ml / 1/2 cup water, should be as warm as your body temperature

Mix all those ingredients together (either by hand or with a mixer with dough hook) until the dough forms a ball and doesn’t stick to the bowl anymore. If it doesn’t come together, add some more tablespoons of water.
Knead it for 5 minutes more, then cover the bowl and let the dough rise in a warm place until it is doubled in volume. This should take about 30-60 minutes.
If you have more time on hand, cover the bowl and put the dough for 24 hours in your refrigerator.You will have a much smoother and tastier dough this way.

Knead it quickly with your hands, form a ball, then press the dough ball into a disk. Put baking paper on you cookie sheet, lay the disk on it and start pressing it flat with your knuckles. This works best with oiled fingers. Get it as thin as you can and like. Now liberally brush the dough with olive oil and punch in some holes with a fork every couple of inches.

And then you can start spreading your favorite sauce and putting on all the toppings you like – in this case it was tomato sauce, Italian Salami, Parmesan cheese, olives – I like my pizza on the simple side. Bake for 15-30 minutes at 220°C/430°F, depending on you how thick the dough was rolled out and how crunchy you like your pizza.


As finishing touch, sprinkle with some olive oil and fresh herbs. Cut into pieces and enjoy with a nice glass of red wine and a movie.

Gulasch. Because autumn is arriving fast.


Do you also have an obsession of going to supermarkets in foreign countries? Personally, I think it’s exiting to see what’s similar, what’s different and to find things I’ve never seen before.
When I was on vacation in France in September, I found fresh “Piments d’Espelette”, or Espelette pepper. Espelette is a small town in Basque Country, near the Spanish border and famous for the houses covered with festoons of drying peppers. When the peppers are fresh, they are bright red and look like regular Hungarian peppers, but are definitively hotter. When they dry, they get darker until they look almost black. They are not extremely hot, but definitely too hot to be eaten as such.

Somehow in my mind, the visual similarity to the Hungarian bell peppers made me think of Gulasch, the perfect dish for cold autumn evenings. And it’s true what they say, Gulasch tastes much better on the next day!

GULASCH / GOULASH

750 g / 1,5 pounds beef
500 g / 1 pound onions
1 small garlic bulb, peeled
4 piments d’Espelette or bell peppers
3 tablespoons olive oil
2-3 tablespoons paprika powder
6-8 tablespoons tomato paste
750 ml / 3 cups / 1 bottle red wine
250 ml / 1 cup water
1-2 teaspoons salt


You won’t need much knife skills here, everything is cut into chunks. Cut the meat into dice – I like them in the 2.5 cm / 1 in range.
Peel the garlic and leave the cloves as they are. Maybe you could half one or two if you have very big ones.
Also, peel the onions, then dice them very coarsely. I only had rather small onions, so I halved them and cut the halves into quarters.


Now it’s the time to get out your latex gloves – especially if you are wearing contact lenses. Imagine rubbing all the capsaicin into your eyes while trying to get out the lens. No fun! By the way, capsaicin in hydrophobic, so use something fatty to make the burn less painful – like heavy or sour cream, cheese or olive oil.

Depending how hot the peppers are, remove the seeds completely or just some of them, then cut the flesh into nice little strips.


Get out your favorite large and heavy pot – mine is a blue Dutch oven I bought in France. They are called “cocotte” around there and “mini-cocottes” absolutely in this year. You see them anywhere, even at gas stations.

Heat the put up while it’s empty on medium-high heat, test if a drop of water “dances” around, then put in the oil. Let the oil get hot too, you’ll see ripples and just a tiny wisp of smoke, then put in a third of the beef cubes at max. Leave them alone and don’t try to turn them until you find that the sizzling noises sound a bit differently. Then try to turn the meat gently, if it still sticks, leave it alone for another minute or so. Maybe it just needs to get a little bit browner, then it won’t stick to the bottom any more.
When the meat has a nice brown color, put in the next few meat chunks and go on as above. Then repeat with the rest of the meat.

I like to brown the meat in 3 to 4 installments, because putting all the meat in the pot at once makes the temperature of pot and oil drop very quickly – and that results in the meat cooking and losing too much juice, and not frying.


If you have a pot that is big enough, you can simply add the onions and the garlic and let them brown with the meat. But in this case, my meat bits were getting in the way, so I put them out and then the onions in. Let it all get a nice touch of color.

See how the onions release a little bit of water and dissolve the brown bits from the bottom of the pan? This is why I always fry the meat first, and then the onions. I’ve tried it the other way round and ended up with onion coals and the meat not browned at all.


OK, get the meat back into the pot and and add the peppers, too. Then the paprika powder and the tomato paste and let it all get a tiny little bit of color.


Open the bottle of red and put it all in. No, this is no waste. You don’t have to by a Grand Cru for that, just something dry and red and heavy, like a Chianti, Shiraz or Rioja.
And don’t forget the salt…


Now, all you need is time. Cover and let it simmer (on low) for several hours, until the meat is soft. In fact, it should be so soft that you can separate the meat with a fork. Add a little bit of water if the meat is not covered any more.


See, no knife needed! And the onions and garlic are all cooked down to a thick and aromatic sauce.
Serve the Gulasch with potatoes, pasta or whatever else you like. And of course you remembered to buy a second bottle of that red? Then pour yourself a nice glass to go with it.