Flammekuchen. The lazy version.


The weather around Munich is changing every day, from sunny and warm to cloudy and cold. And back. Twice a day. This roller coaster ride really gets me tired. Plus taking some medicine that makes me feel nauseous all the time doesn’t help at all. So yesterday evening, all I wanted was a quick bite, watch a bit of TV and a hot shower before going to bed.

As I recently discovered that I’m luckily not lactose intolerant (as I thought for the last 2 years), I really enjoy eating dairy products again! Fructose, on the other hand is a whole different matter and I still have to find out what fruits and which amounts I can eat.

Flammekuchen (or tarte flambée) means “cake baked in the flames” and is a specialty Strasbourg in France is famous for. The original recipe calls for paper-thin yeast dough, with very thin coats of crème fraiche, onions and bacon, then baked for few minutes with very high heat. This is why one person can easily eat a sheet of Flammekuchen the size of a placemat or a baking sheet. My version on the other hand is much thicker, but it is a quick and lazy one and ready to eat in 15 minutes.

FLAMMEKUCHEN / FLAMMEKUECHE / TARTE FLAMBÉE

1 package pizza dough (ca. 400 g / 14 oz) or homemade pizza dough
200 g / 7 oz /1 cup crème fraîche (30% fat) or sour cream
200 g / 7 oz bacon
1 large onion, thinly sliced
salt and pepper


Preheat the oven to 200°C /400°F. Unroll the pizza dough and place it on a baking sheet, with some baking parchment between them (you can roll the dough even thinner if you like, but I didn’t care yesterday). Thinly spread the crème fraîche on the pizza, then sprinkle generously with salt and pepper. Then, cut onion and bacon into very thin strips, scatter onion and bacon bits on top of the crème fraîche. Pop it into the oven for 10 minutes, or until the dough is cooked through and the corners are getting brown. Serve with a nice glass of chilled white wine and enjoy!

Al limone. Even quicker comfort food.


Pasta. Again.
Having a husband who wants to eat pasta every single day, I end up cooking pasta quite often. Today, it was pasta al limone – even simpler and with less ingredients than carbonara, most of which I always have at home. That is cream, lemons and garlic. The pasta doesn’t look very spectacular – some might even say boring – but the taste is fantastic. And the biggest plus: the whole meal just takes as long to prepare as the pasta needs to cook. That means: hot dinner in 10 minutes. Try and beat that.

SPAGHETTI AL LIMONE for 2
(recipe adapted from Sophia Loren – yes, the actress!)
250 g pasta (I like spaghetti, linguini or fussili)
2 tbsp butter
1 sprig rosemary
2 cloves garlic
1 lemon
1/2 cup cream (min. 30% fat)
salt and pepper
Parmesan cheese to taste

Bring enough water to boil (if you’re in a real hurry, use an electric kettle), add enough salt so that it tastes like sea water and throw in the spaghetti.


Heat up a pan, melt the butter on low heat, then put in the peeled and crushed garlic as well as the rosemary and let it fry on low until it gets a light golden color. In the meantime, cut fillets out of the lemon (or if you’re lazy, just squeeze out the juice).


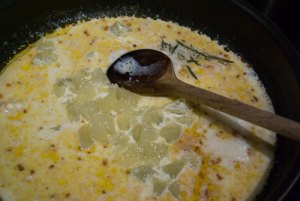
Pour the cream into the pan, then stir in the lemon fillets/juice. I will thicken up a bit, but it won’t curdle – unless of course, you used anything with less than 30% milk fat in your cream. Come to think of it, that’s not even 1/4 of a cup of cream in this meal per person – one helping of ice cream must contain much more than that.


Back to business: drain the pasta and mix it with the sauce, add salt and pepper to taste. And if you have a nice husband who sets up the table in the meantime, you’re ready to eat. Oh, and don’t forget to sprinkle each plate of pasta with lots of pepper and freshly grated Parmesan…

Red lentils. Vegetarian soul food.


This is the stuff that gives this blog its name – at least half of the name. Lentils are very nutritious, they contain carbohydrates, proteins, fibers and – very important in stressful times – folate, vitamin B1 and iron. I like to prepare them as a thick soup, but I don’t puree them as I like the soft bite they have. This is an Indian-inspired version of lentil soup, but basically I just put in all the exotic spices I have in my kitchen. And the best thing is, you have a heart-warming dinner in just 20 minutes!

RED LENTIL SOUP for 3 (or 2 hungry ones)

2 tablespoons vegetable oil
1 onion, diced
(1 small carrot, diced)
2-3 cloves of garlic, diced
1 small sprig of rosemary
1/4 cup tomato paste
1 cup red lentils
3-4 cups water
1/4 teaspoon each, dried and ground: ginger, coriander, cinnamon, nutmeg, chili, pepper
1/2 teaspoon each: garam masala, ras-el-hanout
2 tablespoons curry powder
2 tablespoons dried oregano
2 cardamom pods
1 clove
1 bay leaf
juice of 1 lemon
juice of 1 orange
salt to taste
full-fat yogurt to taste (leave out for a vegan dish)


Chop onion and garlic into small dices, and do the same with a small carrot if you like.

Heat up a nice wide pot and pour in the oil. Always heat up your cooking pots first before putting in any fat, this will prevent your stuff from sticking to the bottom of the pot – this is especially effective if you want to brown meat in a no-nonstick pot.


Let the onions, the garlic and the rosemary sweat for a couple of minutes, until they are soft and translucent. Then, put in the tomato paste and let it heat up for a minute or so, this will take away some acidity and some of the “metal can taste”. Add 3 cups of water and the red lentils and bring to a simmer.


Here come the spices. Just grab everything that looks exotic and/or smells like Christmas.


Add all the spices, the lemon and orange juice and give it all a good stir. I know, this looks like there’s way too much spices, but trust me: it will taste good. And DO NOT add the salt now, or the lentils will take more like double the time to get done.

Let it all simmer for 20 minutes and then give the lentils a taste. If they are soft, but not mushy and some split open, then you’re good to go. Add the salt – I think I took about a teaspoon – and serve with a good dollop of yogurt. Or cream cheese. Or crème fraiche.

Risotto. Great to use the rests in your fridge.

Risotto was – just like many other famous Italian dishes – invented by poor people. The goal is to use the stuff you already have, like vegetable rests and leftovers. I very rarely shop for ingredients for risotto, so when I make one it is different every time. First of all, I search my fridge, pantry and freezer of things I can use and then I decide if I want to make a red or a white version, that is with tomatoes or without. Today, I found some chorizo and a rest of red wine, so that really screamed for a red risotto.


RISOTTO for 3 (or 2 hungry ones
)

3 tablespoons olive oil
250 g mushrooms, cut into thick slices
15 cm chorizo or salciccia, diced
1 onion, diced
3 cloves of garlic, sliced
1 sprig rosemary
1 bay leaf
1 cup risotto rice
1/2 cup tomato paste
1/2 cup red wine
2-3 cups water
1/2 cup peas (I used frozen ones)
salt and pepper
2 olives, cut into rings
50 g / 1/2 stick butter
1 cup Parmesan cheese, freshly grated
some fresh basil leaves

Heat up a wide pot (you’ll need the room to stir later), put in the olive oil and the mushrooms. Let them fry on medium-high heat until they are golden brown, then fish them out of the pot.

While the mushrooms are in the hot oil, you can cut up the chorizo as well as the onion and garlic. When you have removed the mushrooms from the pot, reduce the heat to medium-low and throw in the chorizo bits. They will render quite a bit of fat and that is perfect for sweating the onions and the garlic. Wait until the chorizo bits are much smaller and a bit crunchy, then add onion, garlic, rosemary and the bay leaf.

Stir occasionally until the onions are translucent, then add the rice. Continue stirring until the rice is covered with oil and getting a bit translucent as well. Add the tomato paste and let it fry a bit, too. This will caramelize some sugars and reduce some acids. Pour in the red wine and let it cook until it is nearly vanished. Then add 2 cups of water, the peas, the mushrooms, salt and pepper. Keep the heat on medium-low and stir every minute.

In my opinion, there’s no need for the classic (and terribly exhausting) risotto method, that consists of adding just 1/2 cup of liquid and stirring ALL THE TIME until everything almost evaporated, then adding the next batch. I get the same creamy risotto when I add all of the liquid and stir it every minute (so that it won’t stick to the bottom of the pot). Plus, much of the creamy texture comes from the starch in the round rice and the fat in the butter and Parmesan cheese.

Test the rice for doneness, if it is still hard in the center, add a little bit more water (ca. 1/2 cup) and let it cook in. Test again. It depends on so many factors how much water you will need (the water content in the rice, how wide your pot is and how much water evaporates), but I use 2 1/2 cups for 1 cup of rice as a thumb rule.

When the rice is done – that is no more hard center, but not yet mushy – add the olives, stir, then add the butter, stir until it is completely dissolved and then the cheese. Stir and let it also melt completely. Feel free to add more cheese and/or wine until you have the desired consistency and taste. Remove from the heat and then sprinkle with more cheese and some basil leaves, either whole or cut into strips.

Mayonnaise. The real thing.

Mayo. Who doesn’t love it? The best flavor enhancer I can think of – deviled eggs, ham, salad, fondue, sandwiches, cooked vegetables all taste much better with a glob of the white stuff.

And it’s a very versatile base for other sauces: add some simple ingredients and there’s a whole new world of exiting variations. For example, add some garlic and you have aioli, add ketchup and cognac and there you have a simple Russian dressing (salsa golf as the South Americans call it). Or capers and gherkins and you get remoulade. The possibilities are endless and I’m showing you some of the more exiting fondue sauces in the future.

Just like pesto, I especially like the stuff made from scratch. And it’s not that hard as you might think. Just some basic physics. Here we go:

MAYONNAISE / MAYO

1 egg yolk
1 tablespoon mustard (I prefer Dijon)
salt and pepper
ca. 1 cup vegetable oil (not olive oil – it will taste too bitter)
juice of 1/2 lemon (amount depending to taste and desired consistency)

First of all, separate the egg yolk from the white. Put the yolk in a bowl, add mustard, salt and pepper and leave it there for at least 15 minutes (you should definitively cover it if you have cats…). Meanwhile, freeze the egg white in a big ice cube tray – you can use it later for an angel food cake, a pavlova or macarons.

Why would you leave the egg yolk on the kitchen counter? To get an emulsion (i.e., water and oil not acting like they hate each other), all ingredients must have the same temperature. As I keep eggs and mustard in the fridge but the oil in a regular shelf, the oil will be much warmer than the rest. So, an emulsion would be rather unlikely.

Why add mustard? First of all, it tastes good. But in chemical terms – just like egg yolks – mustard contains substances that help building an emulsion (they are called emulgators). The more emulgators, the more likely you will get a good mayonnaise.

Get out your favorite whisk and stir the yolks and the mustard. It should now look like a uniform mass. Add ONE DROP of oil and stir until you see no more traces of the oil. Add some more drops and stir until you can’t see the oil no more. Repeat. And gradually increase the amount of oil, just be sure to stir until you have a homogeneous mass before adding more oil.

If you find that the stirring gets harder, add some lemon juice (but not together with oil – you want to keep them separate). You will see that the mayo will get softer and a bit whiter. Give it a taste. If it tastes good, you’re done!

Why lemon juice? Well, of course it tastes good – otherwise the mayonnaise would taste just like the oil you used. As as an emulsion consists of oil and water, you’ll have to add something watery to all that oil. Otherwise, the emulsion will break.

Add more oil if you like to have more mayonnaise – one single egg yolk can take 2 cups of oil easily. Just add enough lemon juice.

So, what do you do if the emulsion breaks anyway? (You’ll notice if the mix is more liquid, looking like oil with yellow specks.) Take a second egg yolk and let it get to room temperature (no need to add more mustard or salt). Do as if the broken mayonnaise was just oil, add one drop and stir… go on until you have a creamy mayonnaise and you have used up all the oily stuff.

One more thing: this contains raw eggs. If you are pregnant, have very small kids or if you have a weak immune system, you should not eat raw eggs. But there’s a solution: Follow the recipe as above, only use a cooked egg yolk. The mayo will not be as velvety, but delicious nevertheless.

Chimichurri. My favorite BBQ sauce.

My mom was born and raised in Argentina – and learned to cook from an Italian family. So despite growing up in Germany, I almost never had typical German meals at home. Instead, there was often homemade pasta, gnocchi, lasagna and cannelloni. And the occasional BBQ in the summer that was impossible without this sauce. Everyone has their own recipe, and even mine is very different from the chimichurri my mom makes. There must be millions of variants: red or green, hot or mild, sweet or sour, thick or thin.

This is for Ben and Bryan – my New Zealand mates who liked to eat it straight from the jar with a spoon…

chimi05

CHIMICHURRI

1 large glass jar (best is an open-mouthed jam or gherkin jar)
boiling water
1 large onion
5 garlic cloves
1 tablespoon paprika powder
1 teaspoon dried chili flakes
5 tablespoons dried Italian herbs (basil, rosemary, sage, parsley, thyme)
salt and pepper to taste
6 tablespoons white or cider vinegar
6 tablespoons olive oil
1 cup ketchup

Place the jar and its lid in your kitchen sink and fill both with boiling water. Leave it like that for at least 10 minutes – this is for sterilizing the jar, so that the sauce keeps longer (not that it ever lasted in my fridge that long so that it would have gone bad…).

chimi01

Meanwhile, finely chop the onion and the garlic cloves. Empty the glass jar – be careful not to burn your fingers – place it on your working surface and fill in the garlic and onion dices.

chimi02

The onions should come up to 1/3 to max. 1/2 of the height of the jar. Bring more water to boil and just cover the onions – that makes them softer and less harsh in taste.

Yeah, the label is still on the jar, my brother and I were too lazy to remove it.

chimi03

Add all the dry spices and give it all a stir. Then pour in the ketchup, the vinegar and the olive oil. Give it a taste and then place it in the fridge till you need it.

chimi04

Oh, and it’s one of the most versatile sauces: apart from tasting great with grilled stuff (like steaks, sausages, mushrooms, vegetables, etc.) you can also use it as marinade for chicken and as a salad dressing. Or simply dip in some bread or your finger…

Sausage salad. The Bavarian beer garden classic.

You heard right: sausage salad. Salad made from sausages. Ham sausage to be exact. This may sound weird, but it’s really delicious.

It’s a Bavarian beer garden classic and I guess that’s why this dish was invented: the sausage keeps fresh longer when you put it in a sour and salty solution. And you needed that when the only available air condition was chestnut trees… By the way, most beer gardens in Bavaria are still “cooled” with old chestnut trees and are BYO (“bring your own”), but a little differently as you might expect if you were born in an English speaking country: you’re allowed to bring your own food, but you have to buy the beer there.

wusa06

Sausage Salad / Wurstsalat

700 g ham sausage (“Schinkenwurst”, “Leberkaese” or “Lyoner”)
1 large onion
1 cup gherkin slices
1 cup gherkin brine
6 tablespoons vinegar
6 tablespoons water
salt and pepper to taste

wusa01

Peel the sausages and cut them into 3-5 mm thick slices.

wusa03

Put them into a large bowl.

wusa041

Cut one large onion (or 2-3 smaller ones) into fine stripes and put them on top of the sausage slices.

wusa05

Add 1 cup of gherkin slices (I buy them whole and slice them myself), then give the mixture a toss, so that everything is evenly distributed. Then add salt and pepper and all the liquid ingredients – they should nearly cover the whole mixture. Put it all in the refrigerator and let it there over night.

Serve with pretzels and a nice cold beer.

Salad. Suitable for male humans.

This is a little salad I like to make, because it’s quick and tasty. And not to forget: it’s a light lunch or dinner, but not so light that you’re hungry again after half an hour. Depending on your hunger, you can make it even more filling by adding nuts or Parmesan cheese. Or both.

Another thing: You’ll save washing some dishes, as the salad dressing is made in the pan with the chicken. I like dressing. My husband likes it so much he even drinks it. So don’t be surprised if it looks a little bit too much. If you prefer having less dressing, start with the half amounts of soy sauce and vinegar or let it cook longer.

salat01

CHICKEN SALAD for 2

2 garlic cloves
1 sprig of rosemary
4 slices bacon
3 tablespoons olive oil
300 g chicken fillets
3 tablespoons soy sauce | tamari
6 tablespoons balsamic vinegar
1 package lamb’s lettuce or romaine salad

salat02

Put olive oil, garlic, rosemary and the bacon into a wide pan and let the bacon sizzle on low until it turns reddish and crunchy. Take out the bacon and let it cool on some kitchen roll sheets. Now you have a nicely flavored oil which is a good basis for the dressing.

Cut the chicken fillets into small bits – either bite size or finger-thick strips.

salat03

Turn the heat on medium-high, toss in the chicken bits and let them fry, cook through and get some golden brown spots.
They don’t really have to get brown, as there is already pretty much taste from the bacon and the meat will get brown enough when you put in the soy sauce and the balsamic vinegar.

salat04

Speaking of soy sauce and balsamic vinegar. When your chicken is cooked through (chicken should always be cooked “well done”), pour them into the hot pan, reduce the heat to low and let it all cook until it thickens a bit and looks somewhat syrupy. When you pour in the vinegar, move your head away from the pan – vinegar vapors are not the most pleasant thing for your nose.

While the salad dressing thickens, go wash the salad. And if you like, heat up some French bread (my favorite is baguette) in the oven.

Put the salad on a plate, arrange the bacon and the chicken on the side (so that the salad won’t go flat because of the heat – lamb’s lettuce is very fragile) and slowly drizzle the dressing over the salad. Tastes best with a hot french bread and a nice cold beer.

Pesto. Not from a supermarket shelf.

I love pesto. It tastes great on pasta, you can use it on pizzas or chicken, it even helps putting some taste in an otherwise boring tomato or bechamel sauce.

Problem is, once you have tasted the homemade stuff, you’re never going back to the jars and plastic bags from the supermarket. On the other hand it’s very simple to make at home. You can also use a blender or food processor instead of pestle and mortar, but personally I like to see some bits and pieces.

Parmesan cheese is practically lactose free – like the most hard cheeses. Check the carbohydrates section on the nutrition facts: If a cheese (or any other dairy product without added sugar) has less than 0,5 grams of sugars/carbohydrates per 100 grams, then you can consider it lactose free (for me, even up to 1,5 grams is OK). If you are hyper-lactose-intolerant, better leave the cheese out or substitute it with toasted bread crumbs. Then it’s even vegan!

pesto04

PESTO ALLA GENOVESE

2 plants of basil
1/4 – 1/2 cup olive oil
1 teaspoon coarse salt
3 cloves garlic cloves
3 tablespoons pine nuts
1/2 cup grated Parmesan cheese/toasted bread crumbs
1 tablespoon vegetable oil
a nice jar with tight fitting lid

First, buy 2 plants of basil. Make sure the leaves look all fresh and green and that the stems are standing more or less upright. DO NOT WASH the basil. It takes away a good bit of flavor and – more importantly – you’ll end up having too much water in your paste, which reduces shelf life drastically. Don’t worry, most plants nowadays have grown up in greenhouses and were never in contact with exhaust gases and such.

Time to be brutal. Cut off all the stems right above the earth, then separate the leaves from the stems. Place the leaves in your grinding vessel. I use pestle and mortar made of granite. It weighs over 6 kg.

pesto01

Add 1/4 cup olive oil and 1 teaspoon salt, then start pounding/mixing/pulsing (depending on the tool you use) until all the leaves are squished but still some big parts left.. It’s important to add the oil and the salt to the leaves in the beginning, as the oil prevents oxidation (i.e. the leaves turning into a ghastly brown goo) and the salt helps as a grinding agent.

pesto021

Now put in the garlic cloves and the pine nuts and pound/mix/pulse them with the basil oil until you have the consistency you like. As I said, I like it when there are still some bits left. Put in the Parmesan cheese and now just stir it in. Unless of course, you want to have a homogeneous paste, go on pulsing it down… Add some more olive oil if you like or if the pesto seems crumbly.

pesto03

Fill the pesto into a nice little jar and try to get as few air bubbles as possible. Flatten the surface by hammering the jar (lightly) on the counter, then top it off with some vegetable oil. Why not olive oil? The oil serves as air barrier to prevent oxidation (that is your nice green pesto turning brown). Olive oil crystallizes in the refrigerator, so chances are that your oxidation barrier will break.

Macarons. First take.

As I have said in my Carbonara post, I have tons of egg whites in my freezer. And that gets even worse when I make Pasteis de Nata (a sweet that reminds me of vacations), you need 6 (six!) yolks for one muffin tray. So I’m looking for ways to use those egg whites, apart from the plain white meringue. Quite a few food bloggers post about macarons, about how delicious they are and how difficult they are to make. A way to use those egg whites and a challenge – what could be better?

Have you ever eaten macarons? It’s a French sweet, a bit like a sandwich made of almond meringues and with ganache in the middle. I first tasted them last September in Bordeaux, so apart from being delicious by themselves, they taste like holidays for me… The drawback is that they’re really expensive and they’re – of course – only available in France. There also seems to exist a Swiss variant, named Luxemburgerli.

After reading several posts and recipes, the one presented by David Lebovitz seemed the most reasonable one – hey, he gave it seven tries! Click on this link for the RECIPE and INSTRUCTIONS

This is my first try – doesn’t look too bad:

macaron

Well, not perfect either. I must say that in my case, 2 egg whites may not have been enough – the batter was quite hard and I could hardly squeeze it through the pastry bag nozzle. Nothing like the described “lava consistency”. Also, tapping the baking sheet several times did not make the macarons any flatter; I had to use my moistened finger tips to make the tops more even. They came out pretty thick: the macaron pictured here is 5 cm high. And I only had enough batter for 7 pairs.

But: preheating the oven a bit hotter than you actually need it (and then reducing the temperature when putting the meringues in) really helps generating the little “feet”, i.e. the crumpled meringue you see in the picture.

Needless to say, the chocolate ganache was really easy to make and tastes delicious, maybe because I added 1 teaspoon of rum. As I did not have enough macaron shells, I made truffles as described by Alton Brown.

No question I will make macarons again, as they are really really tasty!