Gulasch. Because autumn is arriving fast.


Do you also have an obsession of going to supermarkets in foreign countries? Personally, I think it’s exiting to see what’s similar, what’s different and to find things I’ve never seen before.
When I was on vacation in France in September, I found fresh “Piments d’Espelette”, or Espelette pepper. Espelette is a small town in Basque Country, near the Spanish border and famous for the houses covered with festoons of drying peppers. When the peppers are fresh, they are bright red and look like regular Hungarian peppers, but are definitively hotter. When they dry, they get darker until they look almost black. They are not extremely hot, but definitely too hot to be eaten as such.

Somehow in my mind, the visual similarity to the Hungarian bell peppers made me think of Gulasch, the perfect dish for cold autumn evenings. And it’s true what they say, Gulasch tastes much better on the next day!

GULASCH / GOULASH

750 g / 1,5 pounds beef
500 g / 1 pound onions
1 small garlic bulb, peeled
4 piments d’Espelette or bell peppers
3 tablespoons olive oil
2-3 tablespoons paprika powder
6-8 tablespoons tomato paste
750 ml / 3 cups / 1 bottle red wine
250 ml / 1 cup water
1-2 teaspoons salt


You won’t need much knife skills here, everything is cut into chunks. Cut the meat into dice – I like them in the 2.5 cm / 1 in range.
Peel the garlic and leave the cloves as they are. Maybe you could half one or two if you have very big ones.
Also, peel the onions, then dice them very coarsely. I only had rather small onions, so I halved them and cut the halves into quarters.


Now it’s the time to get out your latex gloves – especially if you are wearing contact lenses. Imagine rubbing all the capsaicin into your eyes while trying to get out the lens. No fun! By the way, capsaicin in hydrophobic, so use something fatty to make the burn less painful – like heavy or sour cream, cheese or olive oil.

Depending how hot the peppers are, remove the seeds completely or just some of them, then cut the flesh into nice little strips.


Get out your favorite large and heavy pot – mine is a blue Dutch oven I bought in France. They are called “cocotte” around there and “mini-cocottes” absolutely in this year. You see them anywhere, even at gas stations.

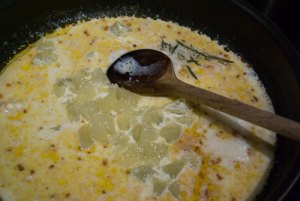
Heat the put up while it’s empty on medium-high heat, test if a drop of water “dances” around, then put in the oil. Let the oil get hot too, you’ll see ripples and just a tiny wisp of smoke, then put in a third of the beef cubes at max. Leave them alone and don’t try to turn them until you find that the sizzling noises sound a bit differently. Then try to turn the meat gently, if it still sticks, leave it alone for another minute or so. Maybe it just needs to get a little bit browner, then it won’t stick to the bottom any more.
When the meat has a nice brown color, put in the next few meat chunks and go on as above. Then repeat with the rest of the meat.

I like to brown the meat in 3 to 4 installments, because putting all the meat in the pot at once makes the temperature of pot and oil drop very quickly – and that results in the meat cooking and losing too much juice, and not frying.


If you have a pot that is big enough, you can simply add the onions and the garlic and let them brown with the meat. But in this case, my meat bits were getting in the way, so I put them out and then the onions in. Let it all get a nice touch of color.

See how the onions release a little bit of water and dissolve the brown bits from the bottom of the pan? This is why I always fry the meat first, and then the onions. I’ve tried it the other way round and ended up with onion coals and the meat not browned at all.


OK, get the meat back into the pot and and add the peppers, too. Then the paprika powder and the tomato paste and let it all get a tiny little bit of color.


Open the bottle of red and put it all in. No, this is no waste. You don’t have to by a Grand Cru for that, just something dry and red and heavy, like a Chianti, Shiraz or Rioja.
And don’t forget the salt…


Now, all you need is time. Cover and let it simmer (on low) for several hours, until the meat is soft. In fact, it should be so soft that you can separate the meat with a fork. Add a little bit of water if the meat is not covered any more.


See, no knife needed! And the onions and garlic are all cooked down to a thick and aromatic sauce.
Serve the Gulasch with potatoes, pasta or whatever else you like. And of course you remembered to buy a second bottle of that red? Then pour yourself a nice glass to go with it.

Blackberry Muffins. Last remnants of summer.


In September, I spent vacation in France. Right in the middle of nowhere between Bordeaux and Biarritz, to be exact. The landscape consists mostly of pine forests that have been planted 200 years ago and the understory is overgrown with ferns, erica and blackberry bushes. As it was exactly the right season for blackberries, my husband and I went for a little picking and photo tour. We came back with 122 photos and 2 cups of blackberries.

As I’m still not sure which fruit and what amount of it I can eat without getting the full effect of my fructose malabsorption, I decided to make some quick muffins (regular sugar “dilutes” that effect). But let me tell you: Baking in a small kitchen that does neither have a scale nor American-style measuring cups turns out quite difficult. Plus, the silicone 6-muffin pan I bought in France did not fit into the miniature oven. The hazards of cooking abroad 🙂

BLACKBERRY MUFFINS (12 regular ones)

2 cups / 250 g all purpose flour
1 cup /250 g sugar
2 tablespoons baking powder
1/2 teaspoon salt
1/2 cup / 60 g almonds, ground
2 eggs
1/2 cup /125 ml milk (or buttermilk)
3 tablespoons butter, melted
2 tablespoons / 30 ml dark rum
1 tablespoon / 15 ml lemon juice
1 tablespoon lemon zest
1 cup blackberries


What to do if the muffin pan does not fit into the oven? Or you don’t have a muffin tin? Take the baking sheet and place as many small cups as you can on it. At least, that is how cupcakes were invented.

As cups don’t have a non-stick coating as your regular muffin tin, coat them evenly and generously with butter and then flour. Smearing the butter into the cups will only work if they are 100% dry, as water and fat repel each other. Make sure the cups are really dry or your muffins will stick…

Oh, and preheat your oven to 200°C/400°F.


Next, try to find any kind of measuring device. As I knew that 1 cup is 1/4 liter, I could easily use this measuring glass for flour and sugar.


Measuring smaller amounts is a bit trickier, you could use a jigger (the pony/small part contains 20 ml, the larger part 40 ml, at least in Europe) or as in this case a cap of a medicine bottle. By the way, 1 tablespoon is 15 ml.

The rum you can see in the background, called “Negrita” is incredibly intense, nothing like the ones I used before and pastry chefs in Bordeaux making canelés generally use it. I guess it’s one of the little secrets that makes them taste so good.


Isn’t this cute? I found this nostalgically packed baking powder in the supermarket. In France and Germany, you get baking powder in little sachets, perfectly measured for 500 g or 4 cups of flour.


With all the searching and improvising, I totally forgot to make pictures when making the dough. Don’t worry, it’s really easy:

Grab a large bowl and mix the dry ingredients: flour, sugar, baking powder, salt and ground almonds. Use a whisk and you don’t have to sift the flour. Then create a little well in the middle.

Get another bowl or large measuring cup for the liquid ingredients: eggs, milk, melted butter, rum, lemon juice and lemon zest. Use the whisk again, especially when drizzling in the lemon juice, then the milk will not curdle. Put the whisk away and take a large wooden spoon or silicone spatula instead.

Now pour all of the liquid mixture into the flour mixture and very, very briefly stir it and don’t worry about lumps (Alton Brown says no more than 10 strokes). Finally, put in the blackberries and very gently stir for a couple of times until the berries are evenly distributed. Then put equal portions of muffin dough into the cups, but don’t overfill them.


Then hope that your vacation miniature oven (that is generally only used for reviving day-old baguette) is hot enough and put in the muffins immediately.

In a muffin tin, they would take 20 min., but the cups were a bit bigger, so they needed 30 min.


Get them out of the cups and let the muffins cool. Then enjoy with a glass of iced coffee on a summer day.

If cooking in a kitchen unfamiliar to you is a little adventure, then baking is even more so. But very much worth it!

Chocolate Chip Cookies. Need I say more?


I must say, I really like cooking and baking, but cookies (especially those for Christmas, named in German “Weihnachtsplätzchen”) never seemed to be right. Either they’re bland and boring. Or burned.
So when I first made this recipe, it was for Cookie Dough Ice Cream, not cookies. But after making a whole batch I realized I only needed half of it for the ice cream. Then I decided to give it a try and bake the rest of it – and to my surprise, it was a full success! Since then, I like baking cookies, at least based on the recipe below.

CHOCOLATE CHIP COOKIES
adapted from Ben & Jerry

100 g / 1 stick / 1/2 cup butter
1/4 cup sugar
1/3 cup brown sugar
1 large egg
1/2 teaspoon vanilla extract OR 1 package vanilla sugar
1 cup / 125 g flour
1/2 teaspoon salt
1/2 teaspoon baking powder
1 cup semisweet chocolate, chopped
1/2 cup pecans, chopped


Measure and put aside all your ingredients. The cool thing about this recipe is that you need each measuring cup once. So no messing up other bowls.

Get the butter out of the fridge and let it get to room temperature. If the butter is very cold and you’re in a hurry, here’s a little trick: cut the butter in to cubes (approx. the size of the dice in a regular board game). Let some water boil and put it into your mixing bowl. When the bowl feels hot on the outside, toss the water out, dry the bowl quickly and put in the butter cubes. They will soften in minutes, but will not melt.


Put the paddle attachment on your mixer, and beat the butter with both sugars on medium speed until it looks light and fluffy, and until some sugar crystals have dissolved. Slow down a bit, add the egg and vanilla, speed up again and beat it until you have an emulsion, that is no streaks of egg left.

In my opinion, you should take out the egg out of the fridge with the butter to get to room temperature. This first step of the creaming method is about getting an emulsion between the fat in the butter and the water in the egg. And that simply works best if both ingredients have the same temperature (see mayo post for more insights into emulsions).


Continue with medium speed and add the flour in 2 to 3 installments (slow down for adding, then speed up to mix it all in). With the last installment, add the salt and the baking powder. You want a dough that is soft but keeps its shape.


Go to low speed and add the pecan and chocolate bits. Grab a spoon and taste it. Yum!


In my opinion, this makes a tremendous amount of cookies, especially if there’s just two eaters and the half of the dough is perfect for making a liter/quart of Cookie Dough Ice Cream. Just freeze it in a flat shape between sheets of plastic wrap, cut into pieces and add in the last minute of the ice cream process.

As I like rather smaller cookies, I used my measuring tablespoon to get out equally sized heaps of cookie dough on a parchment paper. As you can see in the photo, those are way to close to each other for baking – that would result in one big rectangular cookie. No, I froze the batter this way and when those little balls were rock-hard I filled them into a Ziploc bag with the baking instruction written on it.

So every time I need cookies, I preheat the oven to 200°C/400°F, take out the amount of cookie dough I think will be enough (of course it never is) and bake them for 12-14 minutes. Yes, with a stopwatch.

Hummus. Yet another middle-eastern dip.

This may sound a bit silly, but the first time I tasted hummus was in New Zealand. The reasons for this: My co-worker was vegan and loved it. And it was available in the supermarket in dozens of varieties. From plain to lime & jalapeño to sun-dried tomato. With Turkish salsa was my favorite. It was great just sitting on the Auckland pier at lunchtime and having a little pick-nick with hummus and a fresh bread.

When my husband and I returned to Germany, we still had the craving for hummus, but it was nowhere to be found in supermarkets around here. Luckily, hummus is incredibly easy to make.

HUMMUS

1 (400 g / 14 oz) can chickpeas/garbanzo beans
1 lemon, juice only
3 tablespoons olive oil
salt and pepper
3 cloves garlic, crushed
1 tablespoon harissa
1/2 teaspoon ras-el-hanout (seasoning for cous-cous)
1 teaspoon tahini


Open the can (haha), drain the chickpeas and put them in a high mixing bowl. Unless you have a food processor, then put them in the mixing bowl of your food processor. But have an immersion blender so I use the highest vessel I can find in my kitchen.


Add the rest of the ingredients and then stick the blender in (or hit “go” on your food processor). Blend it as long as you want, you can make it light and fluffy or – if you’re like me – leave some bits and pieces for an more interesting structure.


Done! But wait, this looks a bit boring. Let’s make a little topping:

3 tablespoons olive oil
1 tablespoon ground paprika


Heat up the oil and the paprika powder in a point just until it starts to bubble and starts to smell intensively like paprika.


Pour the hot oil over the hummus and enjoy the taste.

Baba Ghanoush. Dip for eggplant lovers.


Basically, I hate eggplants. Especially if they are soggy, mushy, bland and/or bitter. Or even soaked with oil floating in a boring tomato sauce. Horrible.
A year ago I discovered that eggplants – also called aubergines – actually CAN taste good, as long as you cut them in 1 cm thick slices, lace them with garlic and put them on the BBQ until they are dark brown and soft.

And then we went to a Persian restaurant and ordered a mezze platter. There were all those incredibly tasty dips: hummus, some kind of tzatziki, spinach with yogurt, olives, feta and this really tasty dip where I couldn’t place what it tasted like or what it contained. Can you believe my shock when the waiter told me it consisted mostly of eggplant! Since then, I always have to remember myself that I like eggplant, at least in some very specific preparations.

BABA GANOUSH / BABA GANNOUJ / BABA GANNOUGH

1 large eggplant
1 lemon, juice only
3 tablespoons olive oil
2-3 cloves garlic, crushed
salt and pepper
1 tablespoon tahini (or peanut butter)
1 package / 200 g / 1 cup yogurt (Greek style if possible)
1/2 teaspoon ground cumin or ras-el-hanout (seasoning for cous-cous)

Heat up your oven to 200°C/400°F. Stab the eggplant several times with a knife, then put it in the oven and leave it there for 30 min or until the skin is shriveled and black and the whole thing feels soft.
By the way, always punch a few holes in vegetable skins before putting them into the oven, many people report exploding vegetables (just have a go in Google). Not that this would terribly dangerous in a closed oven, but imagine having to clean every nook and cranny!


Get the eggplant out of the oven, grab a large knife and split it in half. Let. It. Cool. I burned my fingers because I was too impatient.
Now it’s time to scoop out the “meat” and I found that the ice cream scoop you see in the picture is perfect for the job. Or just use a regular large spoon.


Once you have removed the skin, place the “meat” into a tall container, add the rest of the ingredients and puree it with an immersion blender until everything is smooth. As I don’t have a food processor I use this method, but feel free to give it a few spins in the food processor if you have one.


I know, it’s not a pretty sight. But don’t let that intimidate you, the taste is great!
Serve with nice pita or focaccia bread, some olives and a glass of cold white wine. Perfect snack for hot summer evenings.

Tzatziki. Greek for dip.


Summer is the best season in my opinion. I don’t mind the heat – on the contrary, I love it – and I enjoy sitting on the balcony in the evenings, feeling a light breeze and waiting for the thunderstorm to break loose. Yesterday we had one of those evenings, and we decided on a light dinner with some pita bread, olives, hummus (recipe coming soon), feta and some taramasalata for my husband (I don’t eat anything that comes from the sea, except tuna).

Then I discovered a package of yogurt and about a third of a cucumber in my fridge – that really screamed out for a tsatziki. So don’t worry if the pictures don’t match the descriptions: I made about a third of the amount mentioned below and that’s just enough for two hungry ones.

By the way, the thunderstorm came much later that night, so we had a nice and calm dinner on the balcony. And it seemed especially calm to us since the workers finished putting a new layer of tarmac on the 6-lane street we live at.

TZATZIKI / TZADZIKI / CACIK

1 cucumber
3 packages / 600g / 3 cups Greek-style yogurt (10% fat)
(OR 1 package / 200 g / 1 cup regular yogurt, crème fraîche and cream cheese each)
3 garlic cloves, crushed
salt and pepper
2 tablespoons olive oil
fresh parsley, chopped


You can skip this step, but the dip will not be as velvety and creamy as I like it to be. Place the yogurt on a cheesecloth (I only had a regular dish towel, works good but not spectacular) in a colander and let it sit there for a couple of hours.

Of curse you should cover the yogurt with the cloth corners, especially if you have cats that loooove high-fat dairy products…


Peel the cucumber and grate it coarsely. I like to quarter them lengthwise and cut out the seed section, because there’s much water in it and I want to get rid of it. To help eliminate the excessive moisture in the grated cucumber, sprinkle with 1 teaspoon of salt and let it sit for 15 minutes. Squeeze out all the water, I like to use my hands but feel free to use a cheesecloth.


Put the yogurt (or yogurt, crème fraîche and cream cheese) into a bowl and give it a couple of stirs until you have a smooth texture with no lumps left. Stir in the drained cucumber, press in the garlic and season with salt, pepper, olive oil and freshly chopped parsley.

Do not do as I did in the photo above, chances are you’ll have lumps or the yogurt/cucumber ratio is not right.


Give it a taste. Add perhaps a little bit of lemon juice if you don’t know what’s missing. Yeah, dried herbs will do too, but fresh are much better.

Eat it with grilled chicken, bread, vegetable sticks, crackers or even on your classic hamburger.

BBQ chicken. Somewhat Indian.


Summer finally arrived here in Munich – at least for the next two days, then it will be raining again. So I enjoy it while I can… And additionally, it’s the last week before my summer vacation! Just 5 more days to go, then I’ll be staying for 3 weeks in a small house in south-western France, just a 10 minute’s drive from the beach. And I’ll be spending the days at the beach and firing up a real barbecue every night. I really miss barbecues. Because there’s a law and/or regulation for everything in Germany, we’re not allowed to have a BBQ or just a gas grill on the balcony. So I have an electric griddle, but it’s really not the same.

Have you ever heard of the Steven Raichlen’s “Barbecue Bible“? It’s a thick cook book with tons of recipes and general instructions for grilling I find very helpful and interesting (but don’t trust me: I like reading cook books like other people read novels). This is one of the recipes I found work very well, even if you only can use an electric griddle (or a simply pan in winter) instead of a proper barbecue. It works really simple and the chicken tastes best with a side of grilled pita or focaccia bread, some tsaziki and maybe a nice green salad. Because you marinate the meat for several hours, it gets a tangy flavor from the yogurt and tastes exotic (but not too much) because of the different spices.

BBQ CHICKEN Tandoori style

175 g / 2/3 cup Greek yogurt (10% fat)
small pinch of saffron threads
3 large gloves garlic, minced
2,5 cm / 1 in long piece of fresh ginger, minced
salt and pepper
1 teaspoon Garam Masala
500 g / 1 lb chicken breasts


Mix the first 6 ingredients together.


Prepare the chicken breast the way you like them and place them in a Ziploc bag.

You can use whatever chicken parts you like, but I’m super picky with veins and silver skin, so I buy boneless and skinless ones and cut everything away I don’t like. By the way, I gently fry all those nasty bits in a pan with a little bit of oil and – as soon it cooled down a bit – my cat Henry is all over it.


Pour the yogurt mixture into the Ziploc bag, close the bag while getting out as much air as possible and make sure every chicken bit is covered with it. Put it in your fridge for a couple of hours – 2 are OK, overnight would be even better (don’t forget to put some beers in you fridge while you’re at it).

Fire up your BBQ/electric griddle and grill them until they are done and have some dark brown bits. Pop a beer and enjoy the meat with a good piece of grilled bread.

Flammekuchen. The lazy version.


The weather around Munich is changing every day, from sunny and warm to cloudy and cold. And back. Twice a day. This roller coaster ride really gets me tired. Plus taking some medicine that makes me feel nauseous all the time doesn’t help at all. So yesterday evening, all I wanted was a quick bite, watch a bit of TV and a hot shower before going to bed.

As I recently discovered that I’m luckily not lactose intolerant (as I thought for the last 2 years), I really enjoy eating dairy products again! Fructose, on the other hand is a whole different matter and I still have to find out what fruits and which amounts I can eat.

Flammekuchen (or tarte flambée) means “cake baked in the flames” and is a specialty Strasbourg in France is famous for. The original recipe calls for paper-thin yeast dough, with very thin coats of crème fraiche, onions and bacon, then baked for few minutes with very high heat. This is why one person can easily eat a sheet of Flammekuchen the size of a placemat or a baking sheet. My version on the other hand is much thicker, but it is a quick and lazy one and ready to eat in 15 minutes.

FLAMMEKUCHEN / FLAMMEKUECHE / TARTE FLAMBÉE

1 package pizza dough (ca. 400 g / 14 oz) or homemade pizza dough
200 g / 7 oz /1 cup crème fraîche (30% fat) or sour cream
200 g / 7 oz bacon
1 large onion, thinly sliced
salt and pepper


Preheat the oven to 200°C /400°F. Unroll the pizza dough and place it on a baking sheet, with some baking parchment between them (you can roll the dough even thinner if you like, but I didn’t care yesterday). Thinly spread the crème fraîche on the pizza, then sprinkle generously with salt and pepper. Then, cut onion and bacon into very thin strips, scatter onion and bacon bits on top of the crème fraîche. Pop it into the oven for 10 minutes, or until the dough is cooked through and the corners are getting brown. Serve with a nice glass of chilled white wine and enjoy!

Al limone. Even quicker comfort food.


Pasta. Again.
Having a husband who wants to eat pasta every single day, I end up cooking pasta quite often. Today, it was pasta al limone – even simpler and with less ingredients than carbonara, most of which I always have at home. That is cream, lemons and garlic. The pasta doesn’t look very spectacular – some might even say boring – but the taste is fantastic. And the biggest plus: the whole meal just takes as long to prepare as the pasta needs to cook. That means: hot dinner in 10 minutes. Try and beat that.

SPAGHETTI AL LIMONE for 2
(recipe adapted from Sophia Loren – yes, the actress!)
250 g pasta (I like spaghetti, linguini or fussili)
2 tbsp butter
1 sprig rosemary
2 cloves garlic
1 lemon
1/2 cup cream (min. 30% fat)
salt and pepper
Parmesan cheese to taste

Bring enough water to boil (if you’re in a real hurry, use an electric kettle), add enough salt so that it tastes like sea water and throw in the spaghetti.


Heat up a pan, melt the butter on low heat, then put in the peeled and crushed garlic as well as the rosemary and let it fry on low until it gets a light golden color. In the meantime, cut fillets out of the lemon (or if you’re lazy, just squeeze out the juice).


Pour the cream into the pan, then stir in the lemon fillets/juice. I will thicken up a bit, but it won’t curdle – unless of course, you used anything with less than 30% milk fat in your cream. Come to think of it, that’s not even 1/4 of a cup of cream in this meal per person – one helping of ice cream must contain much more than that.


Back to business: drain the pasta and mix it with the sauce, add salt and pepper to taste. And if you have a nice husband who sets up the table in the meantime, you’re ready to eat. Oh, and don’t forget to sprinkle each plate of pasta with lots of pepper and freshly grated Parmesan…

Red lentils. Vegetarian soul food.


This is the stuff that gives this blog its name – at least half of the name. Lentils are very nutritious, they contain carbohydrates, proteins, fibers and – very important in stressful times – folate, vitamin B1 and iron. I like to prepare them as a thick soup, but I don’t puree them as I like the soft bite they have. This is an Indian-inspired version of lentil soup, but basically I just put in all the exotic spices I have in my kitchen. And the best thing is, you have a heart-warming dinner in just 20 minutes!

RED LENTIL SOUP for 3 (or 2 hungry ones)

2 tablespoons vegetable oil
1 onion, diced
(1 small carrot, diced)
2-3 cloves of garlic, diced
1 small sprig of rosemary
1/4 cup tomato paste
1 cup red lentils
3-4 cups water
1/4 teaspoon each, dried and ground: ginger, coriander, cinnamon, nutmeg, chili, pepper
1/2 teaspoon each: garam masala, ras-el-hanout
2 tablespoons curry powder
2 tablespoons dried oregano
2 cardamom pods
1 clove
1 bay leaf
juice of 1 lemon
juice of 1 orange
salt to taste
full-fat yogurt to taste (leave out for a vegan dish)


Chop onion and garlic into small dices, and do the same with a small carrot if you like.

Heat up a nice wide pot and pour in the oil. Always heat up your cooking pots first before putting in any fat, this will prevent your stuff from sticking to the bottom of the pot – this is especially effective if you want to brown meat in a no-nonstick pot.


Let the onions, the garlic and the rosemary sweat for a couple of minutes, until they are soft and translucent. Then, put in the tomato paste and let it heat up for a minute or so, this will take away some acidity and some of the “metal can taste”. Add 3 cups of water and the red lentils and bring to a simmer.


Here come the spices. Just grab everything that looks exotic and/or smells like Christmas.


Add all the spices, the lemon and orange juice and give it all a good stir. I know, this looks like there’s way too much spices, but trust me: it will taste good. And DO NOT add the salt now, or the lentils will take more like double the time to get done.

Let it all simmer for 20 minutes and then give the lentils a taste. If they are soft, but not mushy and some split open, then you’re good to go. Add the salt – I think I took about a teaspoon – and serve with a good dollop of yogurt. Or cream cheese. Or crème fraiche.