Carrot dip. The mean brother of baby food.


This looks so innocent, doesn’t it? I really reminds you a bit of baby food, if it weren’t for the olives, right? Go ahead, take a bite. At first, you think: “What is she talking about? Just regular carrots. A bit on the sweet side.” And then it will hit you: the tartness of the lemon juice. The slight bitterness of the olive oil. The complexity of the spices. And last, but not least: the slight burn of chili in your throat.

This is a great dip and it goes very well with all those other oriental-inspired dips, hummus, baba ghanoush and tzatziki. Just serve them all with some pita bread and olives and you have a simple, but very satisfying dinner.

CARROT DIP

250 g / 1/2 pound carrots, peeled and diced
salt
2 garlic cloves, crushed
2 tablespoons lemon juice
1 teaspoon ras-el-hanout (or ground cumin)
1 tablespoon harissa
2 tablespoons olive oil, plus some for garnishing
olives


Around here, you always get carrots in 1 kilo / 2 pound packages. Minimum. So most times, I take the rest of the package I did not use and eyeball the amount of the rest of the other ingredients.


Peel the carrots, cut them into finger-thick slices and cook them in very salty water for about 20 minutes. They should be soft, but not falling to bits.


In the meantime, mix together lemon juice, crushed garlic, ras-el-hanout and olive oil. Hold the salt, there will be already enough in the carrots.

I like to use my immersion blender for this, so I start in a rather high and narrow mixing bowl. But feel free to use a food processor if you happen to own one.


Drain the carrots and put them over the harissa-mixture. Then puree them as fine as you want them. Personally, I like some bits left, otherwise it reminds me too much of baby food…


Serve in a nice bowl when it is cooled down, garnish with some olives and olive oil. Then dig right in.

Obazda. Bavarian beergarden cheese spread.


My god, there she comes again with some funky Bavarian stuff… First that strange sausage salad, and now this… And it even comes with tons of butter…

Obazda means – roughly translated – hodge podge, and basically that’s what it is. Legend has it, a Bavarian innkeeper was standing in his empty (post-war) kitchen, with VIP guests sitting in the pub and waiting for something to eat. He thought he couldn’t serve a half-eaten cheese to those people, so he decided to mix it together with butter, onions and paprika powder. And like many of those dishes born in desperation, it was an instant success.

You can find it nowadays in every beer garden in Bavaria. There are of course a million recipes, but I think this is the most basic and original one: 1 part butter, 2 parts cheese, onion and some spices. Simple and delicious.

This is perfect for that rest of Camembert that has gotten too pungent to eat. But you can use any intense and soft cheese, in some regions of Germany they use Romadour, Limburger or even Harzer. And stretch it with cream cheese if you find the taste too strong.

OBAZDA

150 g / 5 oz overripe Camembert cheese
75 g / 2.5 oz butter, softened
3 tablespoons heavy cream
1 tablespoon paprika powder
1 small onion, very finely diced
2 tablespoons beer
1 teaspoon caraway seeds, optional
salt and pepper
chives, for garnishing
pretzels, either soft or hard ones


Start by weighing the cheese – as this is meant for leftover cheese, this should be your base measure. Then you measure half the amount of butter, by weight of course.

Check the cheese rind: if the edges are very hard and dry, maybe even getting some funky colors (red and yellow being the most common), you could cut some of it away. Leave most of the rind on, just remove anything that doesn’t look too good anymore.


Cut the cheese and the butter into cubes, this makes the mixing progress much easier.


Add the cream and start mixing together the Camembert and the butter into a rather sticky mass. Either take a fork or use your food processor – or even the mixer with a paddle attachment – depending on the quantities you are making.

See, some bits are still left, especially some rind bits: that is wonderful. But it still looks a bit bland, doesn’t it?


Not to worry, just add onions and lots of paprika powder. It will seem too much at the beginning, but once you mixed it in, the spread will have a wonderful color.

Still doesn’t taste right? Add a bit of salt and pepper – and the secret ingredient: beer! You have to try it to believe it, but the beer gives some taste nuances that are very hard to describe.


Cover it and leave it in your fridge for a couple of hours, so that the flavors have time to mingle (but serve on the same day, or the onions will become unbearable). Serve sprinkled with some caraway seeds and lots of chives. Depends on what you like and what is available in your region – both hard and soft pretzels are traditional around here. And of course, don’t forget to serve with an adequate amount of beer!

Note for lactose intolerance sufferers: overripe Camembert contains a very low amount of lactose, as the fungi on the cheese break it down. But test for yourself if you can handle it or not.

Fondue sauces. A rainbow of colors and tastes.


Fondue is our standard meal for special occasions. We have it almost every Christmas and New Year’s and some other times of the year, too. I like it because it’s festive, you get to eat beef tenderloin and for the fact that you can prepare everything in advance. So on the great day, you only have to heat the broth, set the table and everyone is cooking for himself and having fun. Not to mention the romance, coziness and warmth an open fire brings into your house.

And in fact, we prefer the “fondue chinoise” variant, that means cooking thin slices of meat in a broth. As opposed to “fondue bourginonne”, which means cooking the meat in hot oil. That is, of course, tasty like everything that has been fried. But your house will also smell for days as it has been fried. And I’m really not the one to count calories, but food cooked in oil and served with mayo-based sauces simply is too fatty for my taste.


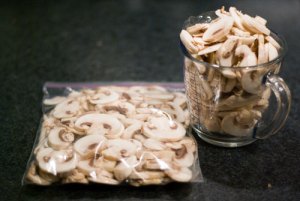
For FONDUE, you’ll need beef tenderloin – and I like to cut it into 5mm-thick slices – a good wine, crispy french bread and lots of different sauces. And of course a rechaud, that means some kind of tripod with an alcohol burner, so you will have a cooking station in the middle of your table. Heat your favorite kind of broth on your stovetop and when it starts simmering, set it on the burner. Everyone around the table picks up one of those large forks and places it with a piece of meat into the broth for as long as he wants. Then you dip it into your favorite sauce an eat it. I like it when every bite you take tastes different.

Here’s a collection of my favorite sauces:

SAUCE CUMBERLAND

1 orange, juice and zest
3/4 cup port
3/4 cup redcurrant jelly
pepper
1 tablespoon mustard powder


For this sauce, you’ll need an untreated or organic orange, as it is about the peel. Peel the orange with a vegetable peeler and try not to get too much of the white stuff. It’s bitter.
Then cut the orange peel into thin strips.


You also want the juice of the orange, it should be around a 3/4 cup. Mix the juice with the peel and let it cook together for a couple of minutes until the peels have softened a bit.


Mix the orange juice with the port. This alone smells incredibly.


Put the jelly into a pot and heat it up to make it more liquid. And yes you can use the pot you used to cook the orange juice without cleaning as it’s going to end up mixed together anyway. Mix the jelly with the orange-port mixture and then season with a healthy dose of pepper and mustard powder. Let it cool completely before serving.

ORANGE SAUCE

1 orange, juice and zest
3/4 cup port
1 cup mayonnaise (best homemade)


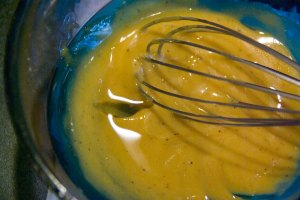
Just as with the Cumberland sauce, peel and juice an orange, then cook it for some minutes. Mix with the port and let the juice simmer for several minutes more until it has reduces significantly and looks like syrup. Let that syrup cool and mix it with the mayo.

SALSA GOLF / RUSSIAN DRESSING / COCKTAIL SAUCE

1 cup mayonnaise (best homemade)
1 cup ketchup
1 tablespoon Cognac


This is one of my all-time-favorites. Just the same amount of mayo and ketchup and a bit of Cognac.


Mix it together and you have a sauce that goes with almost everything.

BANANA CURRY DIP

1 large and ripe banana
1/4 cup yogurt
1/2 cup mayonnaise (best homemade)
1 tablespoon honey
1 teaspoon curry powder
salt and pepper


Peel the banana and mash it. You can either leave some chunks or use a stick blender to make a smooth paste.


Mix the banana puree with yoghurt and mayo, and then season with honey and curry powder.


Give it a taste and see if it needs some salt and pepper. I like a lot of pepper.

AIOLI

1 cup mayonnaise (best homemade)
crushed garlic (amount depends on how much you like garlic, I use 1/2 a bulb)
freshly ground pepper


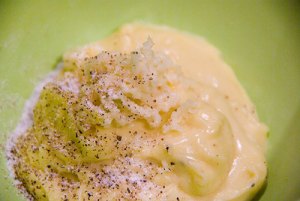
Peel the garlic and crush it. I like to use my garlic press but you can also use pestle and mortar. Mix with the mayo and season with a good bit of salt an pepper.


This is divine. Nothing better than Aioli on meat or just on some bread. Or grilled vegetables.


Here you see all the sauces mentioned above. To help you identify them, from top to bottom:
aioli
banana dip
salsa golf
orange sauce and
Cumberland.

And of course, I eat the tenderloin cooked medium rare, not raw.

Mushroom Sauce. Perfect with Semmelknödel.


Last week on the Semmelknödel post, I promised you a recipe for mushroom sauce. This is a classic combination in Bavaria and in most cases, the only vegetarian option in traditional restaurants. I’m really not a vegetarian, but I sometimes wonder about the “meatless” menus in restaurants – accompanied by gravy, lard or even bacon. Personally, I think humans are omnivores (just ask a biologist about our teeth sets), but I deeply respect the choices people make. You never know what’s really behind it. For example, when I was a teenager, there was a year when just the sight and smell of meat made me feel sick. And it even happens nowadays that I prefer a meatless meal. Just like on other days, I crave a steak. Medium rare.

Note for you fructose malabsorption guys out there: those white mushrooms contain mannite/mannitol and if you can’t handle sorbitol you can’t handle that one either. Apparently, I can’t. Lesson learned.

MUSHROOM SAUCE
for 2

250 g / 1/2 pound / 2 cups sliced mushrooms (I used champignons de Paris)
1 small onion
2 tablespoons butter
2 tablespoons flour
3/4 l / 3 cups liquid (half milk, half your favorite broth)
salt and pepper
lemon juice


Wash the mushrooms and peel them. At least, I like to peel them. And yes, you can wash mushrooms with water, they will not soak up all the water. That’s an old myth.


Slice the mushrooms and measure generous 2 cups – and freeze the rest. Mushrooms freeze wonderfully. I like to grab a handful of frozen mushrooms for pasta sauces or risotto.


And you’ll need and onion, finely chopped.


Heat up a pan on high, then let the butter melt and after that, throw in the mushrooms. If possible, just in one layer. They will draw quite a bit of water – whether you washed them or not. Just keep on cooking until the water evaporates.


That looks about right – the water is gone and the mushrooms are staring to get brown edges. Add the onions and cook them until they are golden and soft.


Now, we’re basically making a Béchamel sauce. Just dump in the flour, stir and let it cook in the butter.


This is the point when you can start to add the liquid: there are no lumps of flour left and the butter-flour mixture has a very pale golden color. Reduce the heat to medium-low and add about half a cup of milk and stir quickly – this will thicken up in a couple of seconds. Keep adding small amounts of liquid and stirring until you have a nice thick sauce.

As for the kind of liquid to use: I like half milk, half beef broth. But I would use vegetable broth when I cook for vegetarians. And you could also cook the mushroom skins in water to get a mushroom broth. And if you like an especially creamy sauce, use all milk and add some powdered broth. For a lactose/dairy free version, just leave out the milk entirely. The sauce will not be as creamy and velvety, but delicious nevertheless.


This looks great, now give it a taste and add salt, pepper – and most importantly – lemon juice. No, the milk will not curdle, but this kind of sauce NEEDS some kind of acid or it will taste creamy and flat.

By the way, it’s also a myth that reheated mushroom sauce is poisonous. At least, if you follow some simple rules: cool it down quickly (eg by putting the pot into an ice water bath) and keep it covered in the fridge overnight. Eat it the next day or throw it away. 

Serve with Semmelknödel, egg noodles and/or your favorite kind of Schnitzel.

Hummus. Yet another middle-eastern dip.

This may sound a bit silly, but the first time I tasted hummus was in New Zealand. The reasons for this: My co-worker was vegan and loved it. And it was available in the supermarket in dozens of varieties. From plain to lime & jalapeño to sun-dried tomato. With Turkish salsa was my favorite. It was great just sitting on the Auckland pier at lunchtime and having a little pick-nick with hummus and a fresh bread.

When my husband and I returned to Germany, we still had the craving for hummus, but it was nowhere to be found in supermarkets around here. Luckily, hummus is incredibly easy to make.

HUMMUS

1 (400 g / 14 oz) can chickpeas/garbanzo beans
1 lemon, juice only
3 tablespoons olive oil
salt and pepper
3 cloves garlic, crushed
1 tablespoon harissa
1/2 teaspoon ras-el-hanout (seasoning for cous-cous)
1 teaspoon tahini


Open the can (haha), drain the chickpeas and put them in a high mixing bowl. Unless you have a food processor, then put them in the mixing bowl of your food processor. But have an immersion blender so I use the highest vessel I can find in my kitchen.


Add the rest of the ingredients and then stick the blender in (or hit “go” on your food processor). Blend it as long as you want, you can make it light and fluffy or – if you’re like me – leave some bits and pieces for an more interesting structure.


Done! But wait, this looks a bit boring. Let’s make a little topping:

3 tablespoons olive oil
1 tablespoon ground paprika


Heat up the oil and the paprika powder in a point just until it starts to bubble and starts to smell intensively like paprika.


Pour the hot oil over the hummus and enjoy the taste.

Baba Ghanoush. Dip for eggplant lovers.


Basically, I hate eggplants. Especially if they are soggy, mushy, bland and/or bitter. Or even soaked with oil floating in a boring tomato sauce. Horrible.
A year ago I discovered that eggplants – also called aubergines – actually CAN taste good, as long as you cut them in 1 cm thick slices, lace them with garlic and put them on the BBQ until they are dark brown and soft.

And then we went to a Persian restaurant and ordered a mezze platter. There were all those incredibly tasty dips: hummus, some kind of tzatziki, spinach with yogurt, olives, feta and this really tasty dip where I couldn’t place what it tasted like or what it contained. Can you believe my shock when the waiter told me it consisted mostly of eggplant! Since then, I always have to remember myself that I like eggplant, at least in some very specific preparations.

BABA GANOUSH / BABA GANNOUJ / BABA GANNOUGH

1 large eggplant
1 lemon, juice only
3 tablespoons olive oil
2-3 cloves garlic, crushed
salt and pepper
1 tablespoon tahini (or peanut butter)
1 package / 200 g / 1 cup yogurt (Greek style if possible)
1/2 teaspoon ground cumin or ras-el-hanout (seasoning for cous-cous)

Heat up your oven to 200°C/400°F. Stab the eggplant several times with a knife, then put it in the oven and leave it there for 30 min or until the skin is shriveled and black and the whole thing feels soft.
By the way, always punch a few holes in vegetable skins before putting them into the oven, many people report exploding vegetables (just have a go in Google). Not that this would terribly dangerous in a closed oven, but imagine having to clean every nook and cranny!


Get the eggplant out of the oven, grab a large knife and split it in half. Let. It. Cool. I burned my fingers because I was too impatient.
Now it’s time to scoop out the “meat” and I found that the ice cream scoop you see in the picture is perfect for the job. Or just use a regular large spoon.


Once you have removed the skin, place the “meat” into a tall container, add the rest of the ingredients and puree it with an immersion blender until everything is smooth. As I don’t have a food processor I use this method, but feel free to give it a few spins in the food processor if you have one.


I know, it’s not a pretty sight. But don’t let that intimidate you, the taste is great!
Serve with nice pita or focaccia bread, some olives and a glass of cold white wine. Perfect snack for hot summer evenings.

Tzatziki. Greek for dip.


Summer is the best season in my opinion. I don’t mind the heat – on the contrary, I love it – and I enjoy sitting on the balcony in the evenings, feeling a light breeze and waiting for the thunderstorm to break loose. Yesterday we had one of those evenings, and we decided on a light dinner with some pita bread, olives, hummus (recipe coming soon), feta and some taramasalata for my husband (I don’t eat anything that comes from the sea, except tuna).

Then I discovered a package of yogurt and about a third of a cucumber in my fridge – that really screamed out for a tsatziki. So don’t worry if the pictures don’t match the descriptions: I made about a third of the amount mentioned below and that’s just enough for two hungry ones.

By the way, the thunderstorm came much later that night, so we had a nice and calm dinner on the balcony. And it seemed especially calm to us since the workers finished putting a new layer of tarmac on the 6-lane street we live at.

TZATZIKI / TZADZIKI / CACIK

1 cucumber
3 packages / 600g / 3 cups Greek-style yogurt (10% fat)
(OR 1 package / 200 g / 1 cup regular yogurt, crème fraîche and cream cheese each)
3 garlic cloves, crushed
salt and pepper
2 tablespoons olive oil
fresh parsley, chopped


You can skip this step, but the dip will not be as velvety and creamy as I like it to be. Place the yogurt on a cheesecloth (I only had a regular dish towel, works good but not spectacular) in a colander and let it sit there for a couple of hours.

Of curse you should cover the yogurt with the cloth corners, especially if you have cats that loooove high-fat dairy products…


Peel the cucumber and grate it coarsely. I like to quarter them lengthwise and cut out the seed section, because there’s much water in it and I want to get rid of it. To help eliminate the excessive moisture in the grated cucumber, sprinkle with 1 teaspoon of salt and let it sit for 15 minutes. Squeeze out all the water, I like to use my hands but feel free to use a cheesecloth.


Put the yogurt (or yogurt, crème fraîche and cream cheese) into a bowl and give it a couple of stirs until you have a smooth texture with no lumps left. Stir in the drained cucumber, press in the garlic and season with salt, pepper, olive oil and freshly chopped parsley.

Do not do as I did in the photo above, chances are you’ll have lumps or the yogurt/cucumber ratio is not right.


Give it a taste. Add perhaps a little bit of lemon juice if you don’t know what’s missing. Yeah, dried herbs will do too, but fresh are much better.

Eat it with grilled chicken, bread, vegetable sticks, crackers or even on your classic hamburger.

Mayonnaise. The real thing.

Mayo. Who doesn’t love it? The best flavor enhancer I can think of – deviled eggs, ham, salad, fondue, sandwiches, cooked vegetables all taste much better with a glob of the white stuff.

And it’s a very versatile base for other sauces: add some simple ingredients and there’s a whole new world of exiting variations. For example, add some garlic and you have aioli, add ketchup and cognac and there you have a simple Russian dressing (salsa golf as the South Americans call it). Or capers and gherkins and you get remoulade. The possibilities are endless and I’m showing you some of the more exiting fondue sauces in the future.

Just like pesto, I especially like the stuff made from scratch. And it’s not that hard as you might think. Just some basic physics. Here we go:

MAYONNAISE / MAYO

1 egg yolk
1 tablespoon mustard (I prefer Dijon)
salt and pepper
ca. 1 cup vegetable oil (not olive oil – it will taste too bitter)
juice of 1/2 lemon (amount depending to taste and desired consistency)

First of all, separate the egg yolk from the white. Put the yolk in a bowl, add mustard, salt and pepper and leave it there for at least 15 minutes (you should definitively cover it if you have cats…). Meanwhile, freeze the egg white in a big ice cube tray – you can use it later for an angel food cake, a pavlova or macarons.

Why would you leave the egg yolk on the kitchen counter? To get an emulsion (i.e., water and oil not acting like they hate each other), all ingredients must have the same temperature. As I keep eggs and mustard in the fridge but the oil in a regular shelf, the oil will be much warmer than the rest. So, an emulsion would be rather unlikely.

Why add mustard? First of all, it tastes good. But in chemical terms – just like egg yolks – mustard contains substances that help building an emulsion (they are called emulgators). The more emulgators, the more likely you will get a good mayonnaise.

Get out your favorite whisk and stir the yolks and the mustard. It should now look like a uniform mass. Add ONE DROP of oil and stir until you see no more traces of the oil. Add some more drops and stir until you can’t see the oil no more. Repeat. And gradually increase the amount of oil, just be sure to stir until you have a homogeneous mass before adding more oil.

If you find that the stirring gets harder, add some lemon juice (but not together with oil – you want to keep them separate). You will see that the mayo will get softer and a bit whiter. Give it a taste. If it tastes good, you’re done!

Why lemon juice? Well, of course it tastes good – otherwise the mayonnaise would taste just like the oil you used. As as an emulsion consists of oil and water, you’ll have to add something watery to all that oil. Otherwise, the emulsion will break.

Add more oil if you like to have more mayonnaise – one single egg yolk can take 2 cups of oil easily. Just add enough lemon juice.

So, what do you do if the emulsion breaks anyway? (You’ll notice if the mix is more liquid, looking like oil with yellow specks.) Take a second egg yolk and let it get to room temperature (no need to add more mustard or salt). Do as if the broken mayonnaise was just oil, add one drop and stir… go on until you have a creamy mayonnaise and you have used up all the oily stuff.

One more thing: this contains raw eggs. If you are pregnant, have very small kids or if you have a weak immune system, you should not eat raw eggs. But there’s a solution: Follow the recipe as above, only use a cooked egg yolk. The mayo will not be as velvety, but delicious nevertheless.

Chimichurri. My favorite BBQ sauce.

My mom was born and raised in Argentina – and learned to cook from an Italian family. So despite growing up in Germany, I almost never had typical German meals at home. Instead, there was often homemade pasta, gnocchi, lasagna and cannelloni. And the occasional BBQ in the summer that was impossible without this sauce. Everyone has their own recipe, and even mine is very different from the chimichurri my mom makes. There must be millions of variants: red or green, hot or mild, sweet or sour, thick or thin.

This is for Ben and Bryan – my New Zealand mates who liked to eat it straight from the jar with a spoon…

chimi05

CHIMICHURRI

1 large glass jar (best is an open-mouthed jam or gherkin jar)
boiling water
1 large onion
5 garlic cloves
1 tablespoon paprika powder
1 teaspoon dried chili flakes
5 tablespoons dried Italian herbs (basil, rosemary, sage, parsley, thyme)
salt and pepper to taste
6 tablespoons white or cider vinegar
6 tablespoons olive oil
1 cup ketchup

Place the jar and its lid in your kitchen sink and fill both with boiling water. Leave it like that for at least 10 minutes – this is for sterilizing the jar, so that the sauce keeps longer (not that it ever lasted in my fridge that long so that it would have gone bad…).

chimi01

Meanwhile, finely chop the onion and the garlic cloves. Empty the glass jar – be careful not to burn your fingers – place it on your working surface and fill in the garlic and onion dices.

chimi02

The onions should come up to 1/3 to max. 1/2 of the height of the jar. Bring more water to boil and just cover the onions – that makes them softer and less harsh in taste.

Yeah, the label is still on the jar, my brother and I were too lazy to remove it.

chimi03

Add all the dry spices and give it all a stir. Then pour in the ketchup, the vinegar and the olive oil. Give it a taste and then place it in the fridge till you need it.

chimi04

Oh, and it’s one of the most versatile sauces: apart from tasting great with grilled stuff (like steaks, sausages, mushrooms, vegetables, etc.) you can also use it as marinade for chicken and as a salad dressing. Or simply dip in some bread or your finger…

Pesto. Not from a supermarket shelf.

I love pesto. It tastes great on pasta, you can use it on pizzas or chicken, it even helps putting some taste in an otherwise boring tomato or bechamel sauce.

Problem is, once you have tasted the homemade stuff, you’re never going back to the jars and plastic bags from the supermarket. On the other hand it’s very simple to make at home. You can also use a blender or food processor instead of pestle and mortar, but personally I like to see some bits and pieces.

Parmesan cheese is practically lactose free – like the most hard cheeses. Check the carbohydrates section on the nutrition facts: If a cheese (or any other dairy product without added sugar) has less than 0,5 grams of sugars/carbohydrates per 100 grams, then you can consider it lactose free (for me, even up to 1,5 grams is OK). If you are hyper-lactose-intolerant, better leave the cheese out or substitute it with toasted bread crumbs. Then it’s even vegan!

pesto04

PESTO ALLA GENOVESE

2 plants of basil
1/4 – 1/2 cup olive oil
1 teaspoon coarse salt
3 cloves garlic cloves
3 tablespoons pine nuts
1/2 cup grated Parmesan cheese/toasted bread crumbs
1 tablespoon vegetable oil
a nice jar with tight fitting lid

First, buy 2 plants of basil. Make sure the leaves look all fresh and green and that the stems are standing more or less upright. DO NOT WASH the basil. It takes away a good bit of flavor and – more importantly – you’ll end up having too much water in your paste, which reduces shelf life drastically. Don’t worry, most plants nowadays have grown up in greenhouses and were never in contact with exhaust gases and such.

Time to be brutal. Cut off all the stems right above the earth, then separate the leaves from the stems. Place the leaves in your grinding vessel. I use pestle and mortar made of granite. It weighs over 6 kg.

pesto01

Add 1/4 cup olive oil and 1 teaspoon salt, then start pounding/mixing/pulsing (depending on the tool you use) until all the leaves are squished but still some big parts left.. It’s important to add the oil and the salt to the leaves in the beginning, as the oil prevents oxidation (i.e. the leaves turning into a ghastly brown goo) and the salt helps as a grinding agent.

pesto021

Now put in the garlic cloves and the pine nuts and pound/mix/pulse them with the basil oil until you have the consistency you like. As I said, I like it when there are still some bits left. Put in the Parmesan cheese and now just stir it in. Unless of course, you want to have a homogeneous paste, go on pulsing it down… Add some more olive oil if you like or if the pesto seems crumbly.

pesto03

Fill the pesto into a nice little jar and try to get as few air bubbles as possible. Flatten the surface by hammering the jar (lightly) on the counter, then top it off with some vegetable oil. Why not olive oil? The oil serves as air barrier to prevent oxidation (that is your nice green pesto turning brown). Olive oil crystallizes in the refrigerator, so chances are that your oxidation barrier will break.