Maultaschen. Not pretty, but very tasty.


What are “Maultaschen”? Well, think of giant ravioli, filled with a meat and spinach. Almost everywhere in Germany, especially in the South, you will find them in the supermarkets and as soup in many traditional restaurants. I have always liked them, but when I visited my aunt and uncle a while ago, the homemade ones were a total revelation. My aunt was so kind to give me her recipe:

MAULTASCHEN

1 tablespoon oil
100 g bacon
1 cup diced onion
1 cup sliced leeks
500 g / 1 pound ground beef
500 g / 1 pound sausage meat or Leberkäsbrät (very finely ground)
250 g / 1/2 pound frozen spinach leaves
2 day-old rolls or 6 slices toast, cut into cubes
4 eggs
1 cup fresh parsley, chopped
salt and pepper
nutmeg, freshly ground
2 packages ready-made pasta dough or wontons


First of all, when you’re buying sausage meat, look for the very finely ground and well-seasoned stuff. Ask your butcher for it. It’s really easy when you live in Bavaria, because then you just buy a raw Leberkäse.

Nobody really knows why it is called “Leberkäse”, ie liver cheese – it contains neither liver nor cheese. It’s more like a regular sausage, but it is baked in this aluminum pan until it is cooked through and has formed a thick dark crust. Then you cut it in slices and serve it in 2 halves of a regular white roll, along with mustard. Bavarian fast food.


This is all about preparation – the French call it “mise en place” – so while the spinach thaws, set up your meat grinder. Then chop and drain the spinach.

Mine is a Kitchen Aid attachment, but feel free to use whatever you have. I have no experience in this, but maybe if you bought ground meat, you could also use a food processor.


Cut the onion into cubes, no need to be exact here. It will go through the meat grinder anyway.


Same with the leeks, just cut them into rings. I had some left from those 1 kilogram packages they sell around here. So I just let it thaw.


And also cut the parsley. It was a whole plant I bought at the supermarket.

Don’t forget about the bacon. Just cut it into strips. Cut the rolls into 1-inch cubes and have the rest of the ingredients ready.


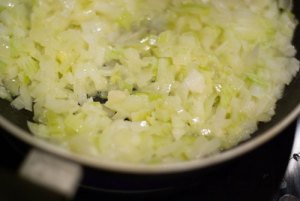
Heat up the oil in your biggest pan and cook the bacon until it has rendered most of the fat but is not yet crispy. Add the leeks and onions and also cook them until they are soft, but are not getting any color. Set it all aside and let it cool.


No it’s time for the meat grinder. I like to make my own ground meat, so I bought a nice piece of beef, cut it into long strips and put them in the freezer for 30 minutes. Then the meat is cold but not frozen, perfect for grinding. Some people also recommend freezing the whole meat grinder (maybe not the handle if you’re using a hand-powered one).

Anyway, once you have ground meat, fill the bacon-onion mixture into the grinder and work it through. And after that, give the bread a ride.

By the way, this is a great way to clean your meat grinder, whether you use bread in your recipe or not. The bread soaks up quite a bit of the fats and juices that stay behind in the mechanism. And cleaning all the nooks and crannies is definitively easier with bread crumbs instead of gooey meat pieces.


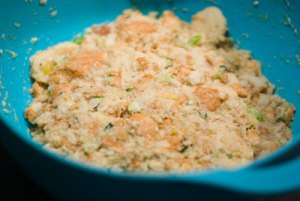
Now for the rest of the ingredients: add sausage meat, parsley, chopped and drained spinach and eggs. And of course salt, pepper and quite a bit of ground nutmeg.

Pleeeeeease always buy whole nutmeg and grind it yourself when you need it. It’s no work at all and it tastes so much better than the pre-ground stuff.


Mix it all, either with a big spatula or using the paddle attachment of your Kitchen Aid. Just give it a couple of turns on the very low setting. Great if you’re having RSI (repetitive strain injury) or carpal tunnel problems.

See, I should have chopped the spinach more finely.
If the filling seems too soft, add a handful of breadcrumbs.


The store-bought pasta dough I bought was a fiasco – though it worked great in the lasagna. As it was Sunday, I had to make a quick pasta dough myself and without a pasta machine or even a decent rolling pin, well, the looked more like the “dumplings of Doctor Caligari”, as Alton Brown puts it.

Cook them in batches in hot salty water or broth and serve them with the broth and a potato salad.


I had tons of filling left, so I shaped it into half domes with my regular measuring tablespoon, set them on a freezer drawer and froze it over night. Then you can easily bag and tag the little meat balls and use them as a filling later on when you found a decent pasta dough at your supermarket. Or a pasta machine.

Grilled cheese and tomato salad. Dinner for one.


Cheese and tomatoes have always been a great combination in my eyes. And a grilled cheese sandwich is some of the easiest soul food I know. Here’s a little secret: put some drops of Kirsch (Kirschwasser) on the bread slices and it will taste just like cheese fondue.


GRILLED CHEESE SANDWICH AND TOMATO SALAD
for 1 person

4 slices toast
butter
some drops of Kirsch, optional
4 slices cheddar cheese
cherry tomatoes
1 tablespoon balsamic vinegar
1 tablespoon soy sauce | tamari
2 tablespoons olive oil
pepper


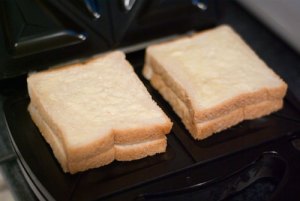
Take the toast slices out of the package and butter them all on one side. I like to keep toast packages in the freezer and I don’t bother thawing the slices – they will be heated enough later.


Now this is key – turn 2 slices over so that the butter is facing down. If you want to, you can now drizzle some drops of Kirschwasser onto the bread, then lay on some slices of cheese. Make sure they don’t go until the edge of the bread. Or you’ll have a big mess to clean up.

Lay on the other slices so that all buttered sides are facing outward.


Preheat your sandwich toaster and put them in for 2-4 min., depending how dark you like them.


While the sandwiches are toasting, let’s make a quick tomato salad. Just slice some cherry tomatoes in half.


And the super quick dressing: just 1 part balsamic vinegar, 1 part soy sauce, 2-3 parts olive oil. Done. OK, maybe a little bit of fresh ground pepper.


Mix in the tomatoes and you’re ready. Dinner for one in 5 minutes. Who could ask for more?

Hot pumpkin soup. Getting ready for Halloween.


Here in Germany, some people started to celebrate Halloween – nowadays, you can even go to parties. But 15 years ago, living in a small town, my friends started the tradition of cooking American food, preferably something hot and watching horror movies. Over the years, we made tons of different things – chili, homemade burgers, spaghetti with meat balls. But one thing remained consistent over the years: pumpkin soup as a starter.

This one is creamy, meaty and bacon-y and of course: hot. But let me assure you: except for the crème fraîche I used for serving, it’s vegan!


HALLOWEEN PUMPKIN SOUP

1 Hokkaido pumpkin, about 1 kg / 2 pounds
1/4 muscat pumpkin, about 1 kg / 2 pounds
1 large onion, diced
4 red potatoes, peeled and diced
2 fresh chilies, cut into rings
3 cloves of garlic, sliced
3 tablespoons olive oil
1 tablespoon brown sugar
1 tablespoon curry powder
1 tablespoon smoked paprika powder
1 tablespoon vegetable broth powder
1 can peeled tomatoes
salt and pepper to taste
chili sauce
lemon juice
crème fraîche for serving


Preheat your oven to 200°C / 400°F and search your kitchen for some kind of ovenproof vessel you pumpkin will fit in. In my case, a 9×13 inch pyrex form.

Cut the Hokkaido pumpkin in half and scoop out the innards – personally, I think an ice cream scoop is the best tool for the job. Then place the pumpkin halves in the form, sprinkle with oil, salt, sugar and maybe a little bit paprika powder.

Place the in the oven for about half an hour. Or until the flesh is soft and you have a nice brown crust.


OK, now we can concentrate on the soup itself:

Remove the seeds and peel from the muscat pumpkin, then dice it coarsely. Peel and dice the rest of the vegetables and slice the chilies.

Heat up a big pot, then pour in the oil and start browning the vegetables. Stir often; you’ll want some brown bits for taste.


When the vegetables are starting to get soft, sprinkle with curry and smoked paprika powder.


Look out for this stuff – I bought it in Spain during my vacation, but I’m sure you will find it elsewhere, too.

I don’t like the expression, but this is the “secret ingredient” to the soup. Basically, it gives kind of a subtle bacon flavor.


Next, pour in the peeled tomatoes and enough water to cover and let it cook for around 20 minutes or until you can just mash the vegetables with the back of a spoon.


When it looks like this, puree it with your favorite method – mine being a stick blender. But a stand mixer or food processor will also work fine.

Give it a taste and add salt, pepper, chili sauce and lemon juice accordingly.


To serve, get the pumpkin halves out of the oven and each into a bowl. Fill the soup into the pumpkin bowl and (if you’re not vegan), garnish with a healthy spoonful of crème fraîche.

Tuna salad filled tomatoes. Hello from the Fifties.


A friend gave me a cookbook from the Fifties as a birthday present a couple of years ago. It is two inches thick and full of wonderful recipes, helpful hints on using leftovers – and even more delightful tips on shaping your food aerodynamically to make it more appetizing. There, I found great classics like meat loaf (in a dozen of variations), upside down pineapple and carrot cakes as well as tomatoes filled with different mayo-based salads, eg egg, chicken or tuna.

My mom used to make the tuna version as appetizer for guests: it’s quick and easy, filling but not too much and enjoyed by everyone, whether they like fish or not. Including me and my dad, who virtually despise everything that comes out of the ocean.

TOMATOES FILLED WITH TUNA SALAD

1 can tuna, drained
1 small onion, chopped very finely
1/4 cup peas
1/4 cup corn kernels, optional
1/4 – 1/2 cup mayonnaise, homemade
paprika powder
some drops of hot sauce
salt and pepper
4-6 tomatoes


Drain one can of tuna – doesn’t matter if you bought the one in oil or brine.


Take a small onion and dice it very finely – onions and tuna are a match made in heaven. And add the peas, I only had frozen (and blanched) ones. But you can take fresh or canned ones if you like.


OK, let’s spice it up a bit. Add some paprika powder for taste and color and maybe some drops of chili sauce, if you happen to like it hot.


Add some tablespoons of mayonnaise and start stirring. Just add enough to make it just come together. Not too much mayo or it will become slushy.

If you like you can cut open some tomatoes, scoop out the kernels with a spoon and fill in the tuna salad. Simple, ready in minutes and impresses you guests.

Chickpea salad. Great for summer.


Do you know those people who can eat anything at any time? Like pork roast and sauerkraut in summer or gazpacho when it’s snowing. I can’t. I am one of those who can’t eat warm and heavy stuff when it’s hot outside. I like to have a light lunch in the summer heat. But a normal green salad is never enough for me – I always end up hungry half an hour later. So this number here is a great compromise: It tastes fresh like a salad, but the chickpeas bring along some carbs and proteins, just the right amount to make you feel satisfied but not stuffed… And it’s ready in minutes – literally – so you’ll have more time to go outside and catch some rays.

CHICKPEA SALAD

1 can chickpeas
4 tomatoes, chopped
1 small onion, finely diced
1 garlic glove, crushed
1 lemon, juice only
3 tablespoons olive oil
salt and pepper
oregano
parsley


Open a can of chickpeas and drain them well. I even like to give them a quick rinse with cold water, but that’s just because the brine has a distinctive smell I don’t like.


Dice the onions and crush the garlic, then mix with the chickpeas in a bowl.


Cut the tomatoes into bite-sized pieces, then add lemon juice, salt, pepper and spices. I only had dried ones, but please use fresh if you have.

Somehow no plant survives my care more than a few weeks. Except orchids. Those are growing one flower after the other. Since December.


Give it all a stir and a taste. You should have about the same amount of tomatoes as chickpeas and some crunchy onions. When it tastes good, go out on the balcony, sit in the sun and eat straight out of the bowl.

Spinach Salad. Like breakfast in the evening.


This is not even a recipe – just a combination of ingredients. Basically, it’s almost everything you would eat for an English Breakfast: bacon and eggs, fried tomatoes and some spinach. OK, the mushrooms and the breakfast sausage are missing, but mushrooms are out for me because of their sorbitol content – and there is no way I will ever eat a breakfast sausage again.

Just arrange everything a bit differently and you’ll have an excellent lunch or dinner salad.


SPINACH SALAD

per person:
2 bacon strips
1-2 eggs, hard boiled or poached
2-3 handfuls baby spinach
1-2 tomatoes
1 tablespoon cider or red wine vinegar
2-3 tablespoons vegetable oil
salt and pepper
a handful of grated Parmesan


First, cook your eggs. This is always said so easily, but I find it kinda difficult to get them just how I like them – with an itty bitty bit of the yolk still runny. Anyway, always punch a little hole on the round end and cook them for 7-10 minutes, depending how “done” you like your eggs. 8 minutes seem to do the trick for me.


Cut the bacon into inch-wide strips and fry it slowly until it is as crispy as you like it. I like it very crunchy. Then get them out and place them on a paper towel so that they get even crispier.


Meanwhile, wash the greens. I always give the salad a quick rinse – no matter if the package says you should or not.


Cut the tomatoes lengthwise in half and blot the cut side dry (with a paper towel or something like that). Fry them just like you would for breakfast – on high and just for a minute or two. You want the cut side to get brown and caramelized, but not a soggy tomato.

Get the tomatoes out of the pan, remove from the heat and deglaze the pan with vinegar, salt, pepper and vegetable oil. No need to cook the dressing, you just want the bacon flavor on your plate, not in the dishwasher.


Arrange spinach leaves, tomatoes, eggs and bacon on a plate, drizzle with the dressing and sprinkle on a generous handful of freshly grated Parmesan (or your favorite cheese). And serve with toast or a nice and fresh bread.

Parmesan-crusted chicken. Perfect with salad.


This is one of the recipes I found on the internet, lost it and then found it again on a totally different site. Turns out I found the original recipe. And turns out, there’s no such thing as Italian-flavored breadcrumbs in Germany – so I just decided to add some Italian herbs myself. And some chili flakes for an extra kick.

I imagine this chicken would also work very well with a Caesar Salad – in fact, this chicken basically is a Chicken Caesar Salad without the salad…

PARMESAN-CRUSTED CHICKEN
for 2, adapted from Hellman’s

CHICKEN
2 boneless, skinless chicken breast halves (about 250 g / 1/2 pound)
1/8 cup | 2 tablespoons grated Parmesan cheese
1/4 cup | 4 tablespoons mayonnaise (I used homemade)
1 teaspoon dried Italian herbs
1/2 teaspoon dried chili flakes
dash of Worcestershire sauce
2-3 tablespoons bread crumbs

SALAD
1 package/head of your favorite salad, in this case lamb’s lettuce
3 tablespoons balsamic vinegar
3 tablespoons soy sauce | tamari
6 tablespoons cream


Cut the chicken breasts into nice medallions, about finger thick. I’m super picky about fat, silver skin and veins, so I cut it all away.

Place them in an oven-proof dish, for example a non-stick pan or a glass/ceramic casserole. And set your oven to 425°F / 220°C.


Mix together Parmesan cheese and the spices. Be creative! Maybe some sun-dried tomatoes or fresh rosemary would be nice.


Measure in the mayonnaise, I prefer homemade.


Stir it all together and give it a taste.

This is also a great dip. And you can make awesome garlic bread with it. Just smear it thickly onto the bread and pop it into the oven until golden brown and delicious.


But back to the chicken. Spread the mayo-cheese mixture onto the chicken bits. Try to coat everything evenly.


Then sprinkle the breadcrumbs on top and pop it into the oven for 10-20 min. – until it’s golden brown and cooked through.


Ah. Golden brown deliciousness!


While the chicken is in the oven, wash your favorite salad (Romaine lettuce would also be nice).

And it’s time to make the dressing. Super simple, really! Just mix together soy sauce, balsamic vinegar and cream.


Just mix them together and you’ll have a perfect salad dressing.

And if you think about it, it’s even low-fat… You will say: “Cream? Low-fat? Yeah right.” But look at it this way: Oil is 99% fat, cream has 30% fat. Do the math.


Arrange salad, dressing and crunchy chicken on a plate and tuck in!

Semmelknödel. Bavarian bread dumplings.


When I was 12 years old, my family moved to Bavaria. Before that I only knew Semmelknödel as a side for special occasions, eg the roast turkey on Christmas. But it was the pre-packaged stuff that came in individual plastic bubbles and that only tasted good when you spooned a LOT of gravy on top. But in Bavaria, those bread dumplings are served with almost any kind of roast that comes with a dark sauce. Most commonly: roast pork with dark stout sauce. And the vegetarian version: with mushroom sauce – more on that next week. Other great combinations are pot roast and goulash (that’s my favorite combination). After a while, my mom got to know some people better and one lady showed her how simple those bread dumplings are.


This is the best part: When you have leftover dumplings, cut them into thin slices and fry them in butter until they are brown and crusty on both sides. Serve either with herb butter, sour cream or – according to my husband – ketchup. That’s why I never half the recipe although we’re only 2 eaters.

SEMMELKNÖDEL / BAVARIAN BREAD DUMPLINGS
Side for 4 persons

10 day-old rolls or 1 pound stale white bread/soft pretzels, finely sliced
1 small onion, finely diced
1 tablespoon butter
250-500 ml / 1-2 cups hot milk
3 eggs
salt and pepper
fresh parsley


In Bavaria, you can buy packages of so-called “Knödelbrot”, ie finely sliced and a bit dry rolls, with the recipe printed on the foil. In my opinion, that somehow contradicts the spirit of using leftovers, so I collect white bread, cut it into 3 mm thick slices and freeze them in a big ziploc-bag. Everything goes in there: French baguette, regular rolls, those toast ends that nobody likes, pretzels with the salt scraped off.

When you’re ready to make the dumplings, pour them into the biggest bowl you have.


While the bread slices thaw, very finely chop an onion and let it sauté with the butter for a couple minutes. You want them soft, but not brown.You can use a pan on the stovetop or zap them in the microwave. Just fill the onions into a glass bowl, put the butter on top and close with a lid or a little plate. Let it run for 2-3 minutes and be careful not to burn your fingers.

Also, bring the milk to nearly a boil. 


Now is the time to bring it all together. Crack the eggs open, put the onions on top and season with parsley, salt and pepper. Then slowly drizzle the hot milk onto the bread, making sure that every bread bit gets its share of milk. Leave it alone for at least 20 minutes.

How do you know how much milk to take? That depends totally on how dry the bread is. If it is still flexible, 1 cup may be enough, but if the bread slices snap and break, you’ll need much more milk to soften them.


Here’s the fun part: Mash it all down with your hands. I wouldn’t know what you should do if you don’t like to get your hands dirty, but you will have a hard time rolling the dumplings later on. So, don’t think about it and plunge right in.

Mash the bread until you have a somewhat homogeneous mass, but there’s no need to overwork. It’s absolutely OK if there are some big dry chunks left.

To roll the dumplings, first wet your hands, then scoop out a handful of the mass. Press it together to squeeze out a bit of air and then roll it into a ball, making sure that the surface has no holes. Holes are bad. Holes let the water in, making them all soggy.
Wash and moisten your hands after every dumpling, or your fingers will be terribly sticky and looking fuzzy.You should get around 8 dumplings out of this amount of bread.


Fill your biggest pot 3/4 full with water and an heavy pinch of salt and bring it to a boil. Then turn down the heat to medium. Carefully place the dumplings into the water, examining every one and re-rolling it. Let them simmer for 20 minutes with the lid half on. Fish them out with a slotted spoon and place them in a warmed serving dish.

Serve with your favorite stew or sauce. Or let them cool and fry them with some knobs of butter. Either way: simple and delicious.

Chorizo and Potatoes. Minimalistic in every way.


When I visited Spain some time ago, we went into a tapas bar. At first, I thought: “Do I really want to eat here?” It was really dark, from the ceiling were hanging dozens of whole hams, the interior was shabby and the floor was covered with used toothpicks. But at a closer look, all the people inside were having a good time, the whole 10 meters of the bar top were laden with snacks of all kinds and it all smelled incredibly good. So we ordered some sherry and took from the bar what we liked. We had planned to eat dinner afterward, but we came out of the bar feeling slightly tipsy and incredibly full.

One of the classic tapas is chorizo and potatoes cooked together and you won’t believe how easy this is. It tastes complex, the sauce looks like it has been cooked for hours and it warms your soul. But all you need is found in all kitchens, even that of a student that has just moved in. As for cooking skills: if you can hold a knife and know how to turn up the heat on your stovetop, you’re good to go.


CHORIZO AND POTATOES

1/2 – 1 chorizo or salsiccia sausage, hot if possible
450 g / 1 pound potatoes
1 large onion
garlic (optional)
olive oil
salt and pepper


This is basically all you need: chorizo, potatoes and an onion. Garlic is optional and you should be able to find some kind of oil or fat in your kitchen. And I really do hope there’s salt and pepper around. Oh, and you’ll also need water. I don’t know why, but nobody mentions water in the ingredient list in cooking but always in baking.

As for the hardware, you’ll only need a knife, a spoon to stir and a pot or pan. OK, maybe a cutting board, but that’s it. Even the most rudimentary equipped kitchen will have all this.


Cut everything into nice, big chunks. No need to be exact here, just cut it the way you like.


I like my potatoes in 1 cm cubes, no matter if I fry or cook them. Again, cut them any way you like, but they should be somehow bite-sized.

If you peel them is up to your tools and skills, your taste – and your laziness…


Heat up your pan or pot on medium, then add the oil and the chorizo. Let the sausage fry until you see a dark crust forming on them.


Add the onions and the garlic and also cook them in the oil until they are soft and the edges start to get brown.


Add the potatoes and let it cook on medium-low for about 25 minutes, until the potatoes are done and most of the water has evaporated.


Fill into your favorite bowl or plate, or eat it just right out of the pot. No garnishing.

Tastes best with a glass of red wine and some green olives. Think of your visit to Spain ages ago.

Mozzarella salad. Close, but not caprese.


Do you also hate tomatoes in winter? As much as I love a fruity tomato salad on a hot summer day, tomatoes around here are terrible after September. They will be bland, sour and almost “green” tasting. I think it’s awful.

Instead, I used some jalapeños I planted in spring which are now getting a very nice red color. The plants were growing quite nicely on my balcony until it got too cold. Now they live inside and every couple of days I get to pick a red chili. They’re not really hot, just a tiny little bit spicy, just the right amount to go very well with mozzarella. You’ll have the classic color combination of a caprese salad, but definitively a very different taste!

This is an entry for “Mozzarella Revolution”, a German blog event from the site buntcooking, where every use of mozzarella is OK, unless if it’s caprese… You know me, I don’t like following rules.

Blogevent | Mozzarella Revolution | 1.10.-31.11.09

MOZZARELLA SALAD

1 mozzarella cheese
3-4 jalapeño peppers or other mild chilies
3-4 leaves basil
3 tablespoons olive oil
2 tablespoons balsamic vinegar
salt and pepper


Slice the mozzarella, the chilies and the basil leaves, put it all into a bowl. Then add salt and pepper.


Generously pour olive oil and balsamic vinegar on top, then enjoy with garlic bread and a glass of wine.
And snicker at people who buy tasteless greenhouse tomatoes in November.